Cordingley puzzle 25
White to play and win
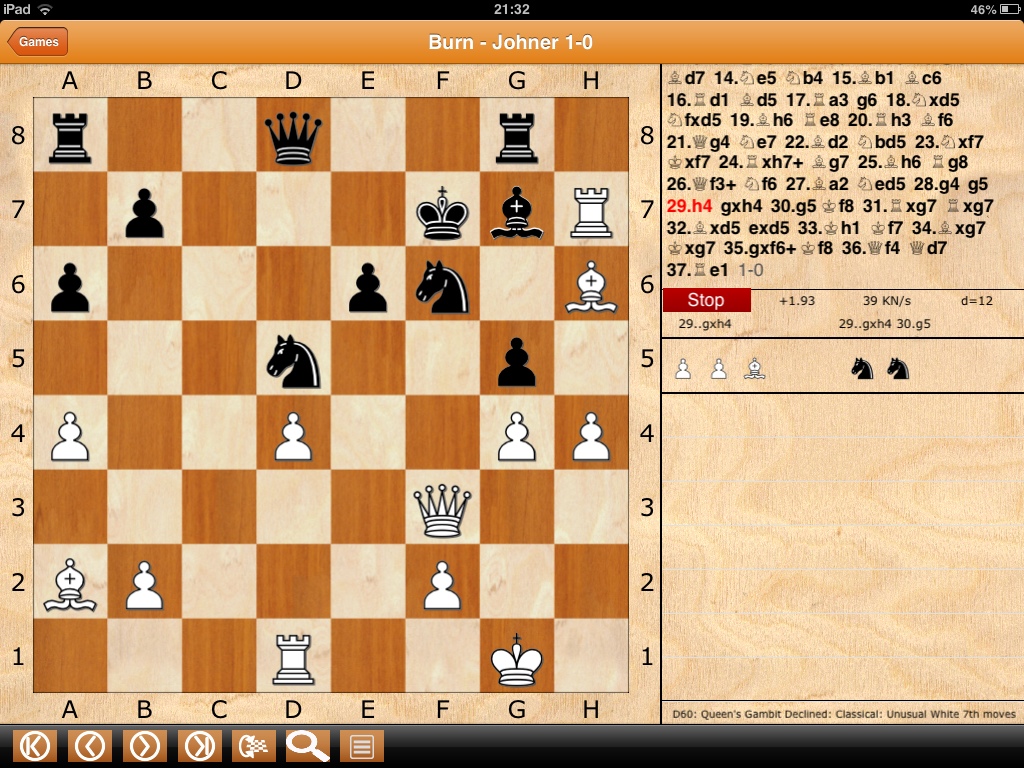
Burn-Johner, Ostend, 1906
Solution
Like puzzles 5,10, 15, 20 and so on, this puzzle was printed in FEN notation in the book. So I had to set up the pieces on the board, and in this case did it rank by rank, starting with the 8th. As soon as I had put the R on h3, I knew the white squared bishop would be on the b1-h7 diagonal, and so saw the solution by sight.
1 Nf7! destroys the king side, and after 1…Kf7, both the pawns on h7 and g6 fall: no need to calculate further: or so I thought, until I realised that after 2 Rh7+ Bg7! is a defence which has to be overcome (2…Kg8 loses trivially to 3 Bg6).

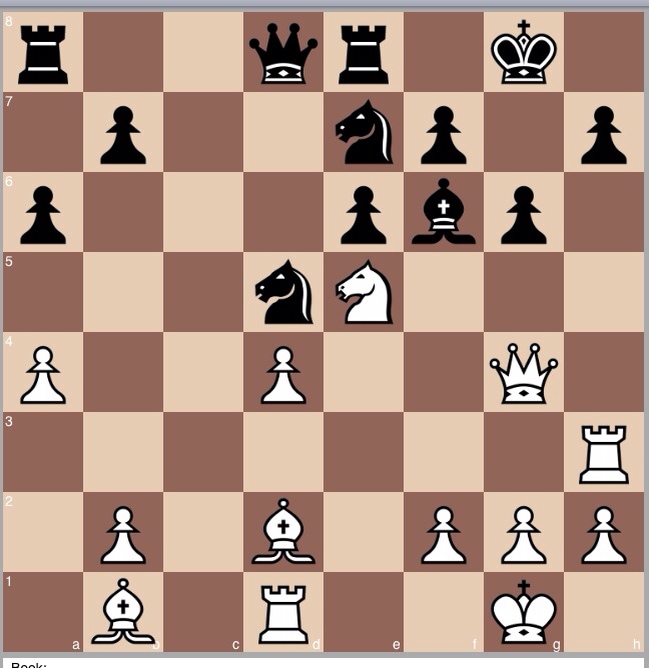
If I had played 1 Nf7 in haste, as well I might, I would start to panic by the time the following position had been reached: it is the type of good position which, at my level, it is fairly easy to fritter away, and peter out into a disappointing loss.
By contrast, if I had seen 2…Bg7, I might not have dared play 1 Nf7 in a classical time limit game, not being able to see to a conclusion the above position: a negative feature of my style of play is to be cowardly, to want certainty, to not have the courage to gamble. I suspect, here, in this specific starting position, I would have gambled with 1 Nf7; not with conviction, but for want of something better: white's position demands aggression on the kingside.
On reaching the second position, I hope I would have found 1 Ba2!, the move Burns played in the game. It threatens to take on g7 and then on e6, so clearly Ned7 is the only defence, when I would doubtless have played 2 g4, and hoped for the best. If I were to be honest with myself, I know I would be far from certain of the outcome. Burn, by a series of excellent moves, makes it clear: though Stockfish does have preferences on several occasions.