Test your chess: Reitstein problem 64
Black to play and win
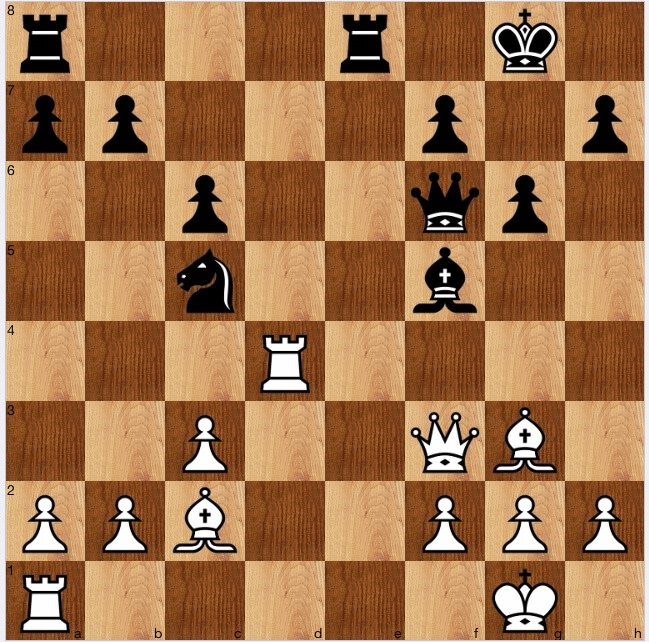
ED Hill v L Wilken 1958
Solution
I enjoyed this one. It took me longer than it should, although perhaps it is one of those cases where the solution is only easy once you see it.
When solving problems, there are different units of time:
Instantaneous; which this one wasn't- those you solve more or less instantly;
The standard British unit of Time– the ones you solve in the time it takes to make a cup of tea;
And the longer ones: those that take a dog walk to crack; and, alas
Some I can never solve.
This one took most of a dog walk, but perhaps should have been a cup of tea problem.
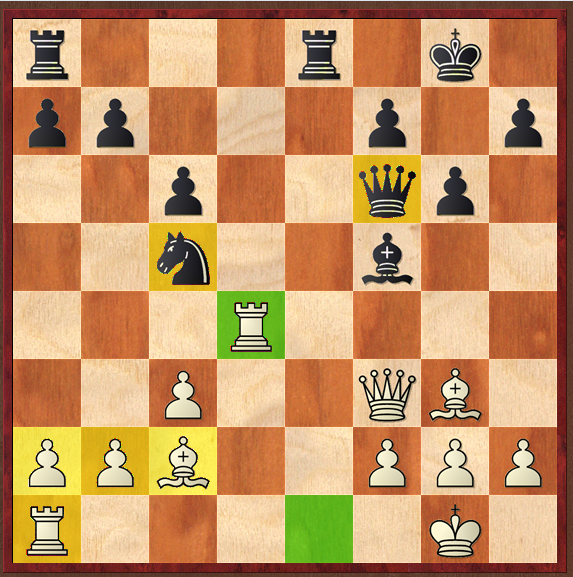
In the above diagram, the green squares are where there are biffs or threat to biffs; c2 is also such a square, but is coloured yellow, as with the other LPDO squares. Note in particular that the Pa2 is LPDO because the Ra1 is tied to defending e1.
It was only by doing this analysis, and seeing that 1…Qe6! biffs the LPDO Pa2 that I realised that Qe6 also threatens the decisive Qe1+, mating, so that on the next move the LPDO Bc2 can be taken. That is how I solved this one (also noting that 1…Qe7? is far less strong because after 2 h4 Bc2 white then has 3 Bd6 forking the Qe7 and LPDO Nc5).
I read somewhere, I don't recall where, that motifs such as pins and forks should be studied and the different ways of getting out of them understood, structurally. So, one way to get out of a pin is for the pinned piece (Bf5) to move; another way is for the piece behind it (Qf6) to move especially where the move creates a greater threat: and that is the case here. Qf6-e6 both breaks the pin by moving out of it, and creates a major threat (back rank mate) so that the LPDO Bc2 can be taken. Had I followed this type of analysis of pins, I could have solved this problem much faster.
