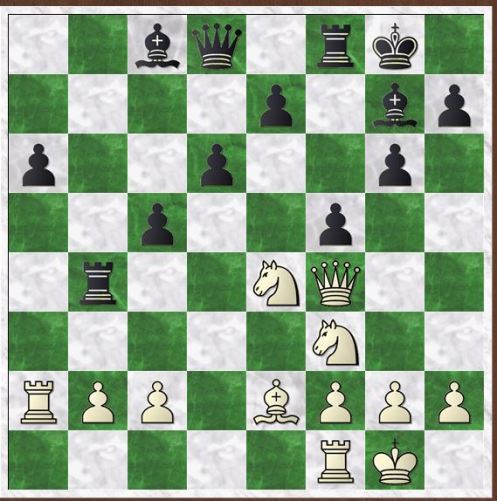
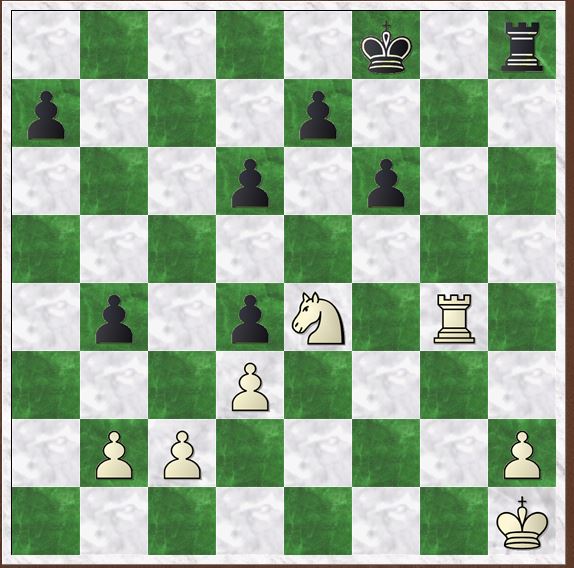
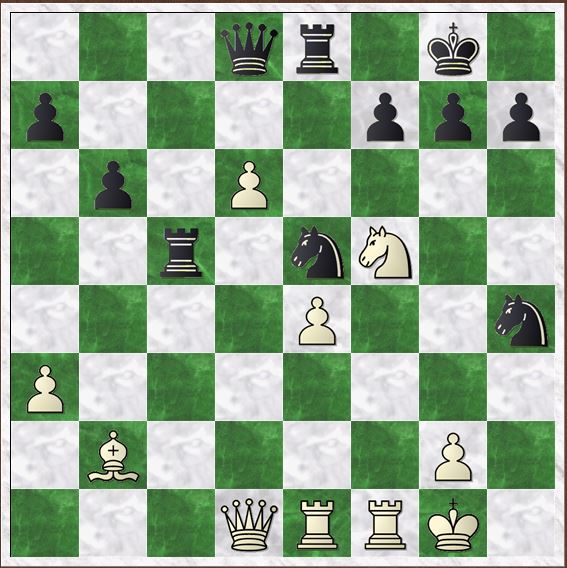
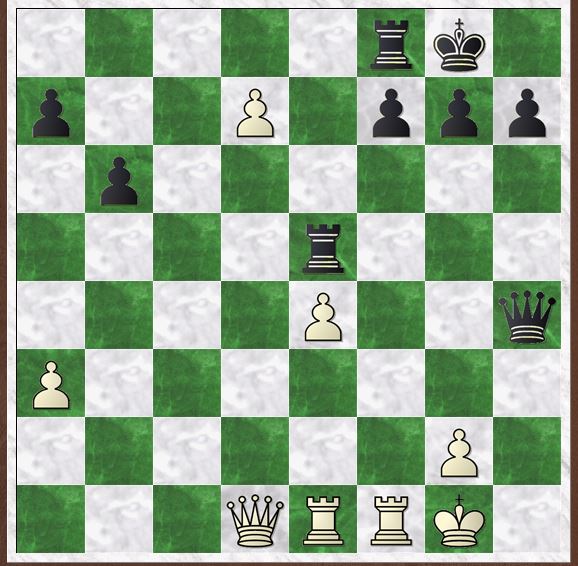
White to play and win after Black plays …Bd5 in the diagram position

Suttles v Ostojic, Belgrade 1969
Solution
Examine all biffs, leads to (after first looking at and rejecting 1 Rd7) 1 Qf6+ which is a version of Purdy’s potassium cyanide.
Black is forced to capture (if 1…Kf8 defending the queen, 2 Qh8 mate) when after the exchanges White emerges a piece for a pawn up.
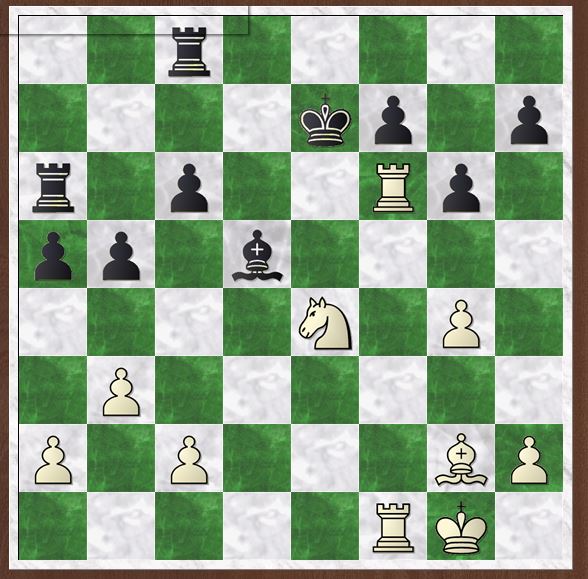
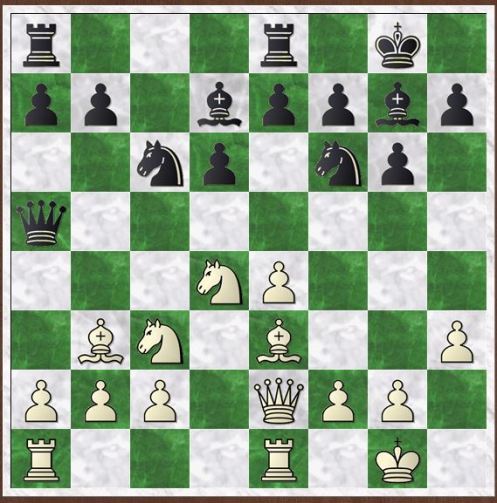
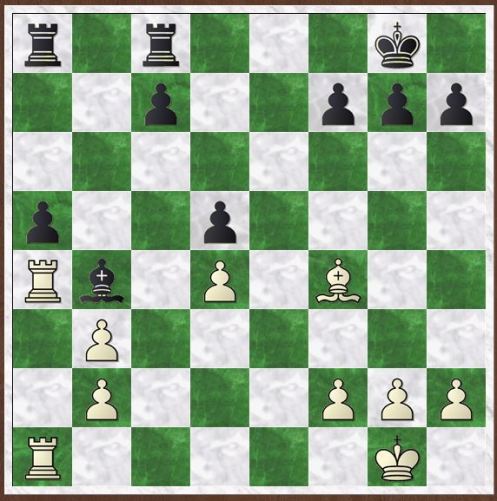
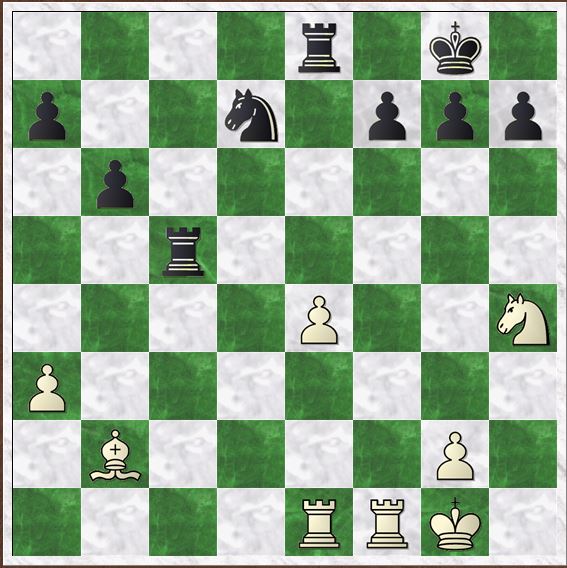
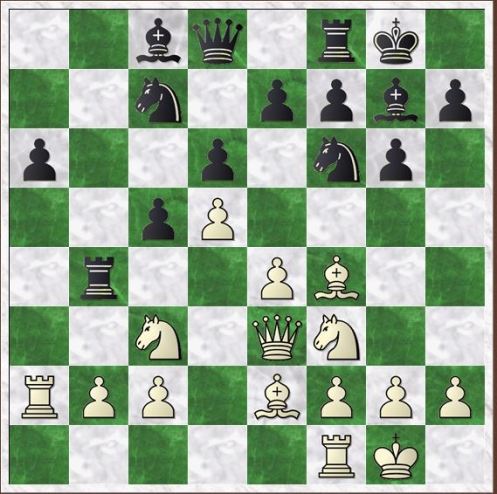
White to play and win
Andersson v Doda, Lodz 1969
Solution
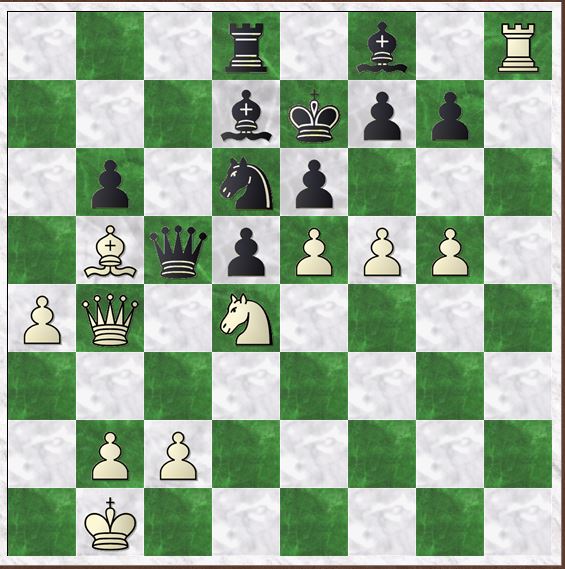
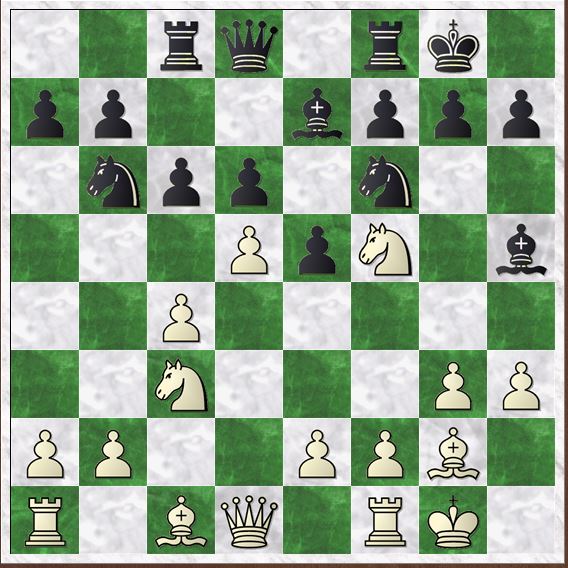
The key thing in this puzzle is ‘does White need to be worried about Rh2+ winning the Queen’? Let us say White did a pass move, 1 b3, then 1….Rh2+ 2 Qh2[] Nh2, but White then mates by 3 Nh7+ Ke8[] 4 Rg8 mate.
So, Rh2+ isn’t a present threat, and therefore 1 ef! and if say 1…Ne5, then 2 Nh7+ still wins, for the same reason- 2…Ke8 3 Qg8+ Rg8[] 4 Rg8 mate. Instead, 1…Nf6 prevents the mate when 2 Ne4 buffs the queen whilst also threatens 3 Qg7+ biffing the LPDO Rh8.
In the game, Black played 1…Nh2 and resigned after 2 Nh7+.

Purdy based analysis would also help solve this problem. He taught his readers to spend some of one’s thinking times ignoring threats, imagining they could not possible executed: what do you want to do absent the threat- here, unhinge the Ng4 by capturing its support, the Pf5- then the calculation shows that the threat can indeed be safely ignored.
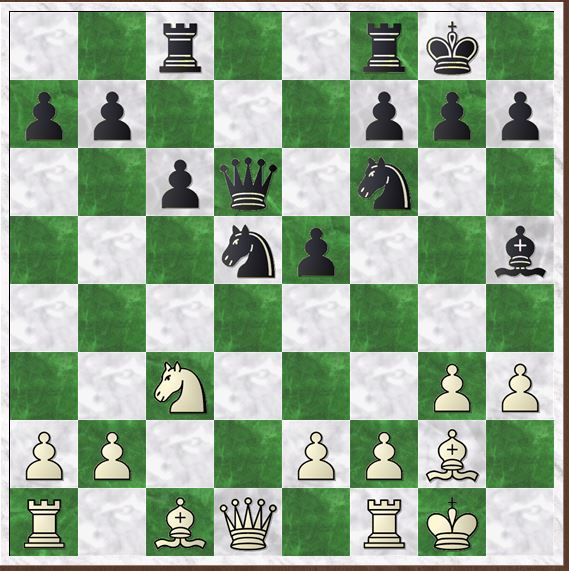
Interesting, my engine thinks White is better, not winning: 1…f6! 2 Ne4 Qf5 3 Bg4, change everything, and the resultant position is “only” +1:
Evaluate 1 Qe2
Espig v Radulov, Raach 1969
Solution
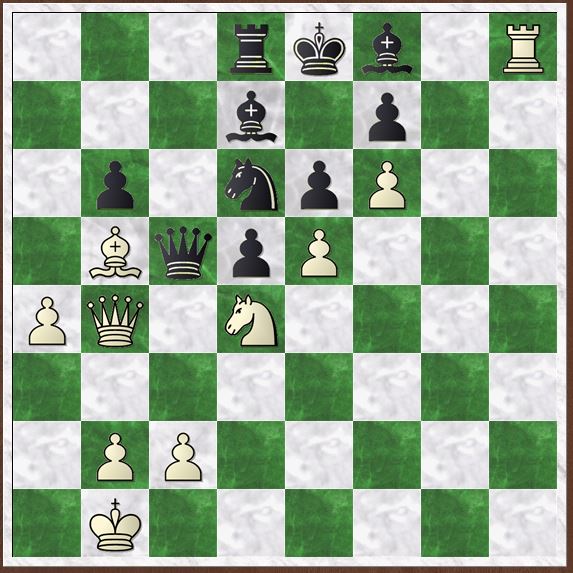
The presumption is that 1…Ne4 wins a pawn because of the discovery on the Nd4, and this move was played.
However, it loses: 2 Nc6 Bc6 3 Ne4 Be4 and now 4 Bd2! discovers an attack on the Be4: Black resigned.
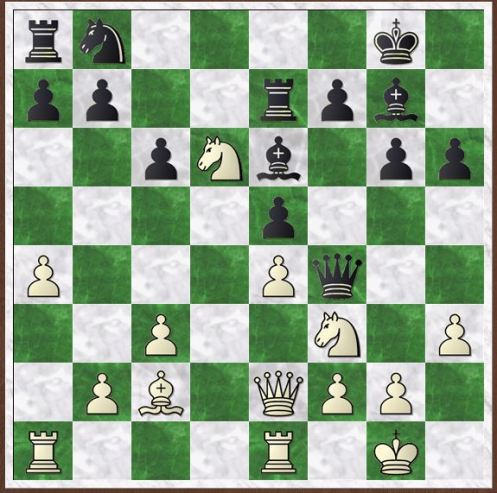
White to play and win
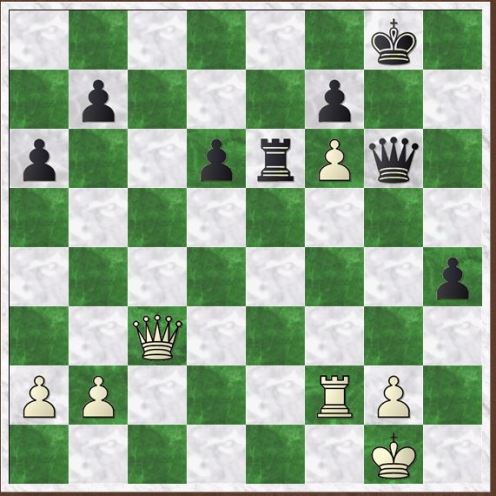
Spassky v Larsen, Palma de Mallorca 1969
Solution
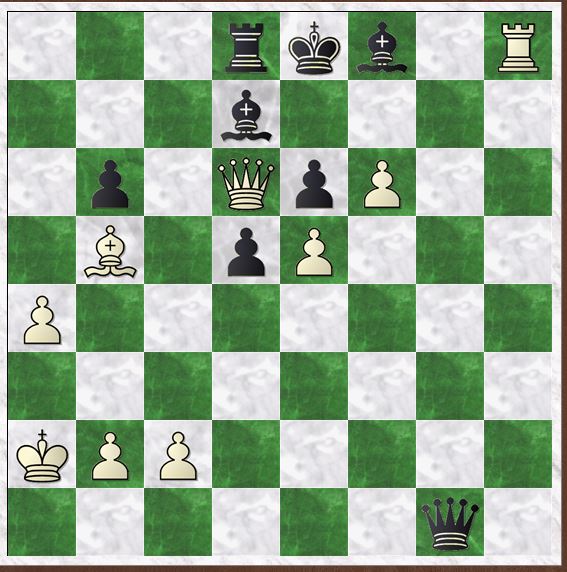
Fairly easy today. 1 Qc8+ Kh7[] 2 Qe6!

2…fe (2…Qb1+ is no different- Black doesn’t have a perpetual after 3 Kh2) 3 f7 and White emerges a rook up.
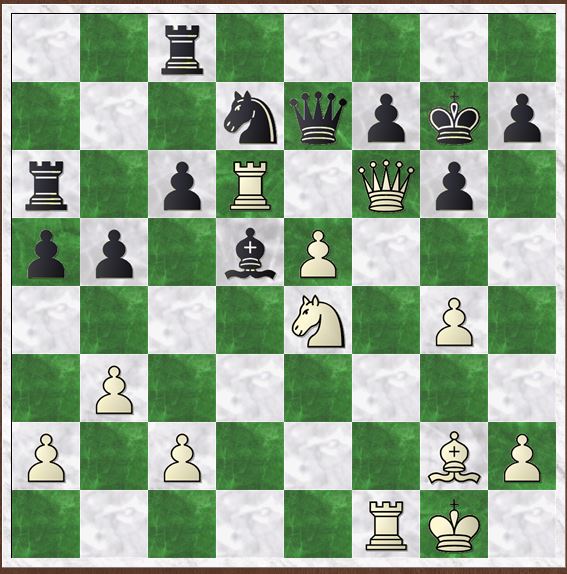
White to play and win
Zinser v Lombardy, Zagreb 1969
Solution
A nice problem, which took me a while to solve. In the game, White didn’t play the best combination, winning prosaically after 1 ed+ but there is a forcing line. After two or three attempts, without success, I did what I often do, took the problem with me (in my head) on my daily dog walk: and it came fairly quickly.
1 f6+ gf[] 2 gf+ Ke8[]
And now the key move, 3 Ne6!!.
Firstly, 3…Qb4?? is mated by 4 Nc7 or, I would say the nicer, 4 Ng7. Secondly, 3…fe loses to 4 Qg4! which fulfils several roles. Minor one: prevents Qg1+; major one, threatens Qg6 mate; equally major one, also threatens Qe6 mate, so that 4…Bb5 loses to 5 Qe6 mate.
So, 3…Qg1+ 4 Ka2 fe[] 5 Qd6 and 1-0
Nice.
Evaluate 1 Bc7
Tuk v Assenova, Lublin 1969
Solution
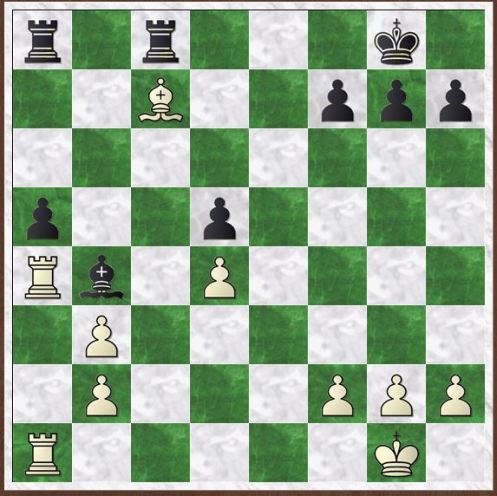
White probably thought that the threat of a back rank mate meant that he had won a clear pawn, but after 1 Bc7 Rc7 2 Rb4 and even Rc1+ Black survives. 3 Rc1[] ab and now I think the rook and pawn ending is level, despite White’s present extra pawn. Black’s rook gets sufficient activity, and White’s King is tied down. However, Black has even better, by 2…Rac8!! he unpins his a pawn, and threatens back rank mate: White loses his Rb4.
White to play and win, after Black has just played 1…Nh4?
Teschner v Martius, Munich 1969
Solution
This one isn’t totally convincing, but the main line is 1 d7! Rf8? and now Teschner played 2 Nh4 Qh4[] 3 Be5 Re5[]
and now the very pretty 4 Rf7!!. If 4…Kf7 then 5 Rf1+ and promotes. I found a different move order, which the engines tell me is just as good, namely 2 Be5 Re5[] 3 Qd4 winning the exchange since the Re5 is pinned to the Pg7, and if 3…f6 the Nh4 becomes a LPDO.
However, 1..Qd7 is better: then after Queens come off White is better, but the game ‘goes on’:
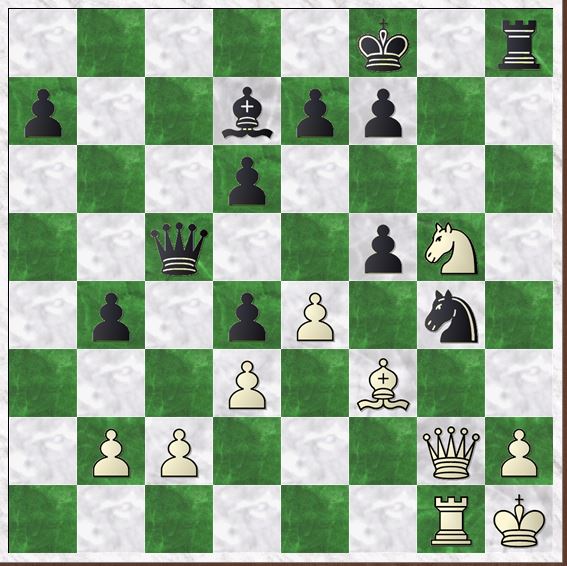
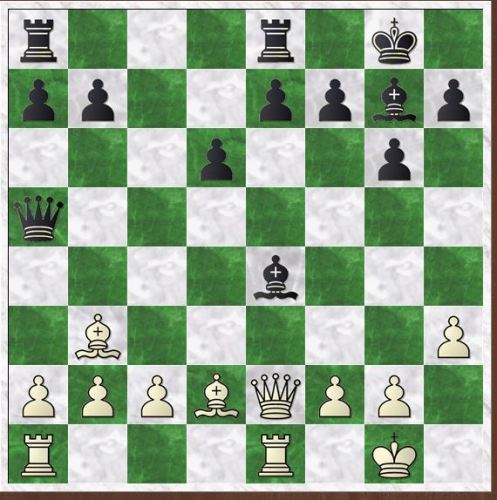
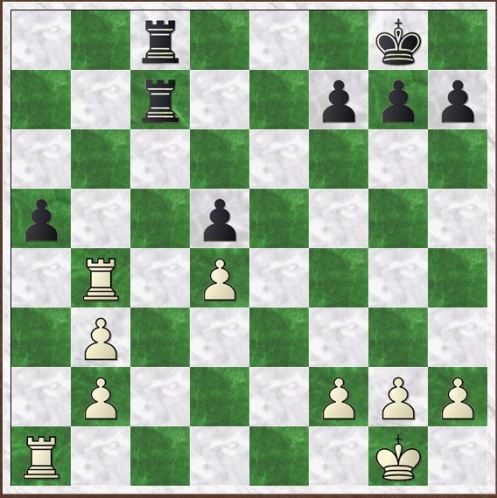
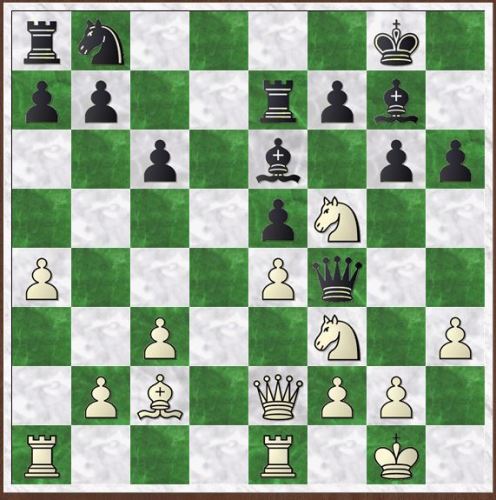
White to play and win
Csom v Ostojic, Amsterdam 1969
Solution
A rest day, today. Black’s Queen has strayed into a net and 1 Nf5! wins it- Black can do nothing about 2 g3. The cute point about 1 Nf5 is that from there the N looks at h6, so preventing 1..h5 with the idea of 2…Qh6.
White to play and win
Darga v Stein, Amsterdam 1969
Solution
I more or less immediately knew the answer had to be trap the Be7 with the Pd5 pushing to d6, but was troubled about the way to do it, and also whether to many pawns or too many weaknesses would be created. In the end, I found the game continuation, though had it been my own game, I might have chickened out and played a routine move like 1 b3.
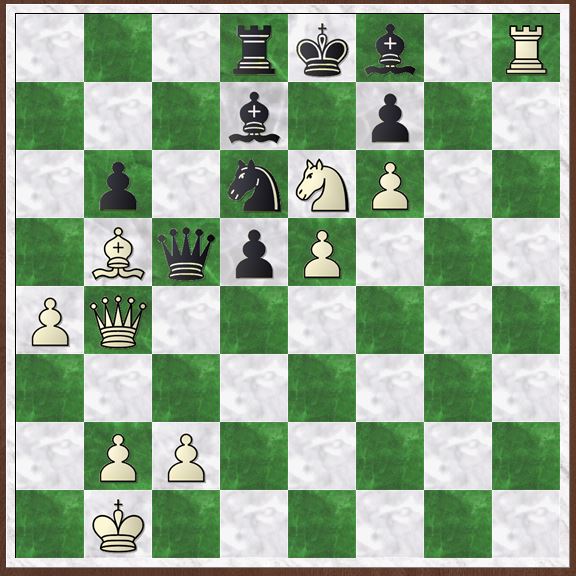
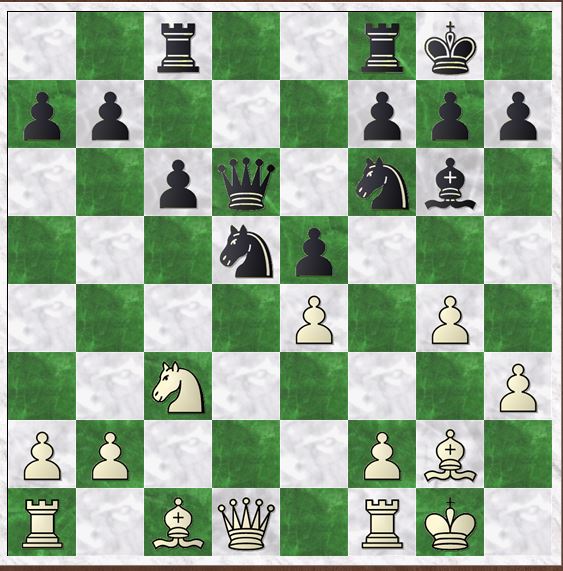
However, it being a problem I did find 1 c5! forcing 1… Nbd5, when 2 cd Bd6[] 3 Nd6 Qd6[] results in this position.
Here, the Qd6 is a LPDO and there is a jump-biff Qd1-d6, using Purdy’s language, so firstly the Pe2 pin must be broken by 4 g4 Bg6 and then 5 e4 wins a piece.
Then after some simplification the end result is:
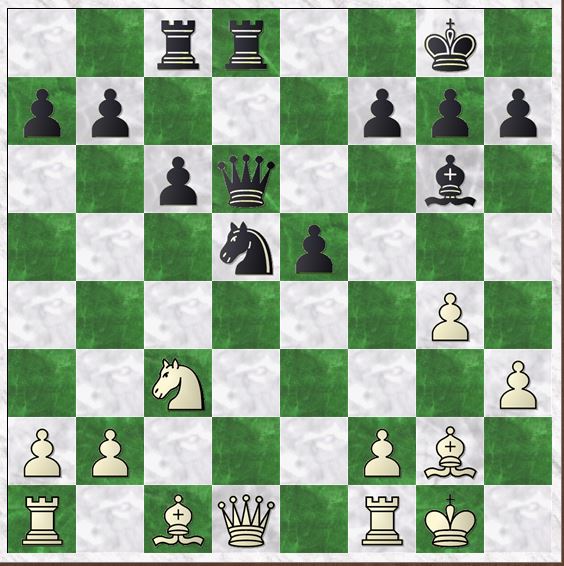
White is better, and my engine says +2, though if I were playing White against Magnus Carlsen I would not be confident of success. The whole game is worth playing through to see how Darga beat the great Leonard Stein; the game is in Megabase.
Black to play: analyse
Westernin v Jansson, Uppsala 1969
Solution
In the game, Black missed the winning tactic, and actually lost quickly. But knowing it is a puzzle, it is not too hard. (Actually, I doubt the Megabase 2012 game score: the end position, after only a few more moves, is unclear/even, definitely not lost for Black).
Black has a few tactical tries, such as taking with either N on d5, but 1…Ncd5? is plain bad (2 ed) as is 1…Nfd5 (2 Nd5). But another biff, 1…Ne4! is far stronger.
2 Ne4[] (else Black has just won an important pawn for free) 2…Nd5 3 Qd2[] (hitting the LPDO Nd5 since 3 Qc1? drops the also LPDO Ne4) and 3…Nf4 4 Qf4[] f5. (3…Re4 is just as good too)