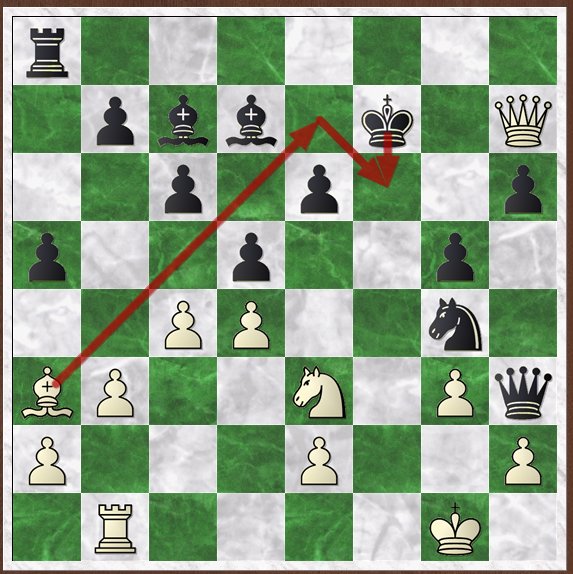
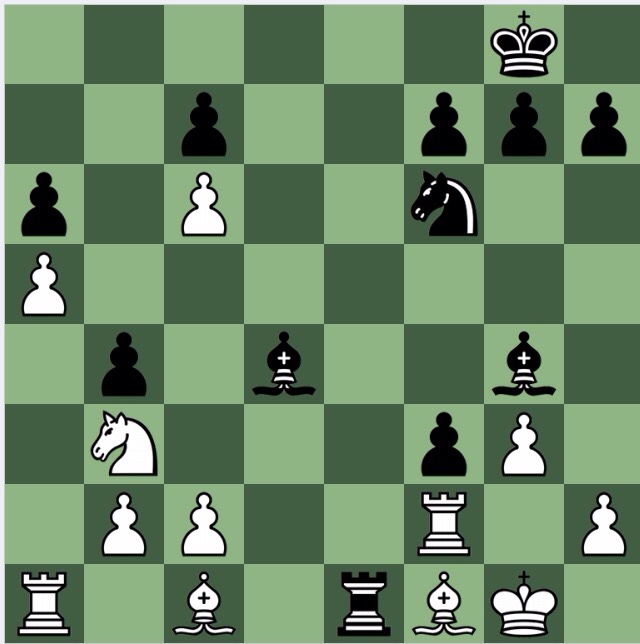
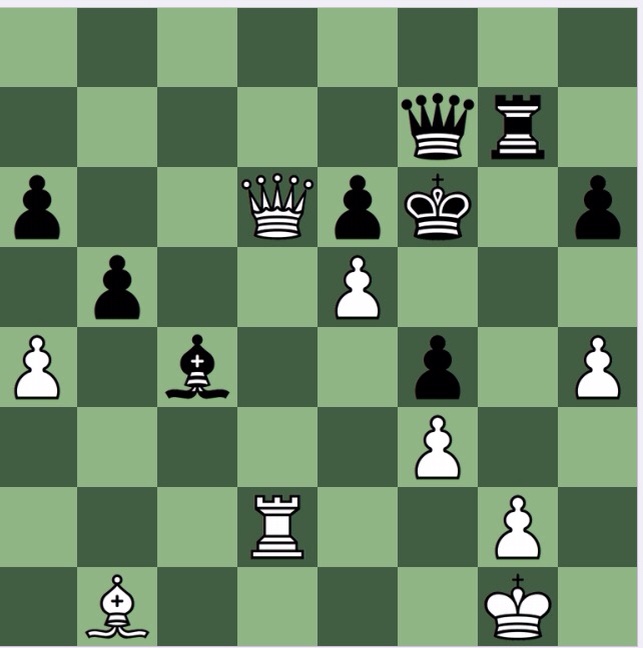
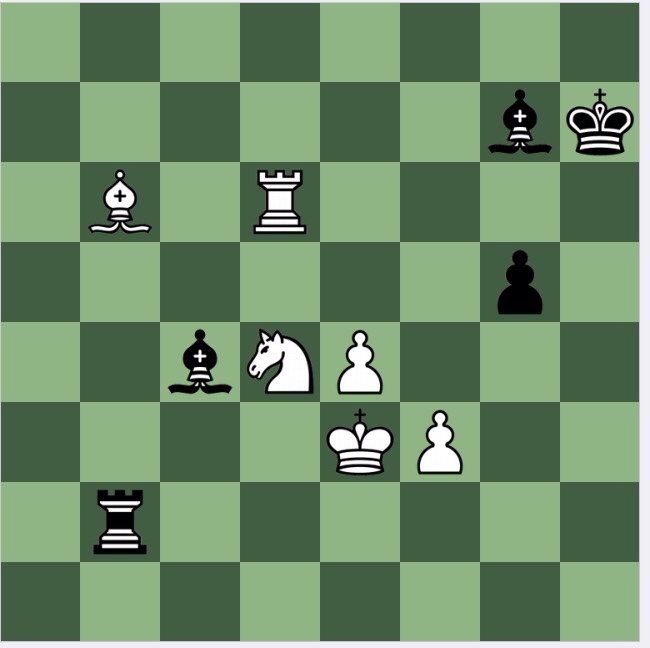
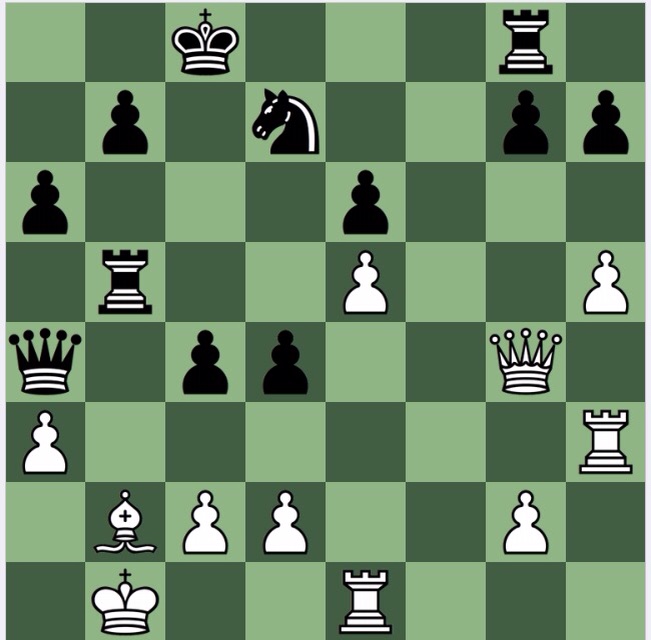
Black to play and win
Vorberger v Scholz Austria 1964
Solution
1…Qa2 is the first try, trying to exploit the back rank mate threat (the Ra1 is tied to defending the Bc1) but it doesn't quite work.
Instead, the move order needs refining, as is so often the case. 1…Bf3! and if 2 Qf3 Qa2 now does work, since e1 isn't sufficiently protected.
The second point of the position is that if instead 2 gf then 2…Rc1+ 3 Rc1[] Qg5+ is a double attack and the LPDO Rc1 drops off.
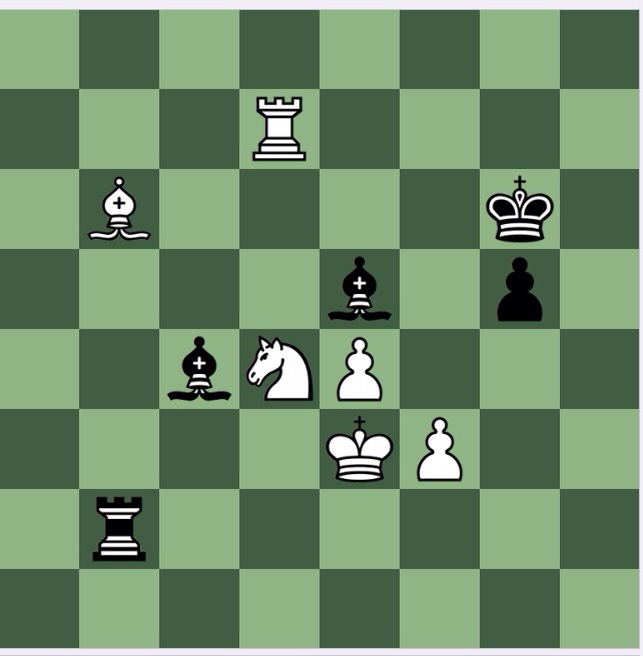
Black to play and win
Madan v Gragger, Tel Aviv 1964
Solution
After first looking at ways of adding to the pressure, like 1…Ne4 or 1…Bh3, and finding them lacking, I turned to examine all biffs and found the solution : 1…Bf2+! 2 Kf2 Ne4+
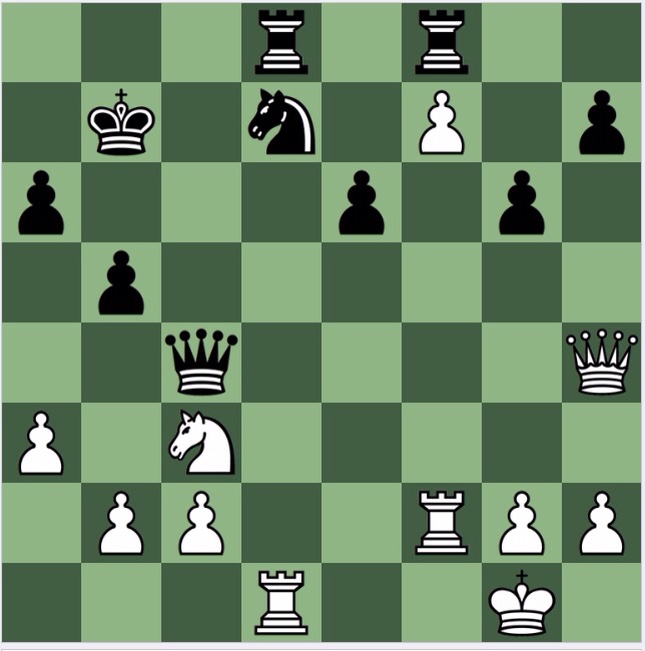
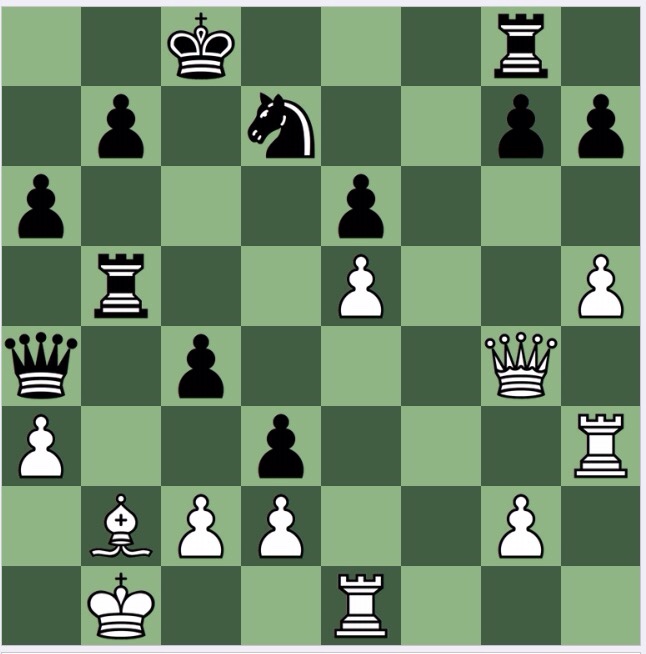
White to play and win

Kraidman v Bouwmeester, Tel Aviv 1964
Solution
I found the nice, and winning, 1 g4!, which takes advantage of the trompe d'oeil that the Ne5 doesn't hit f3, being pinned, so that if 1…Rg4+ 2 fg Qg4+ White can play 3 Rg2 and Black has only one more check, after which the Ne5 falls with check.
However, Stockfish shows me that the move I rejected, without too much thought, is even stronger, and the lines are pretty. 1 Qf8+ which I assumed would be well met by 1…Qf7:
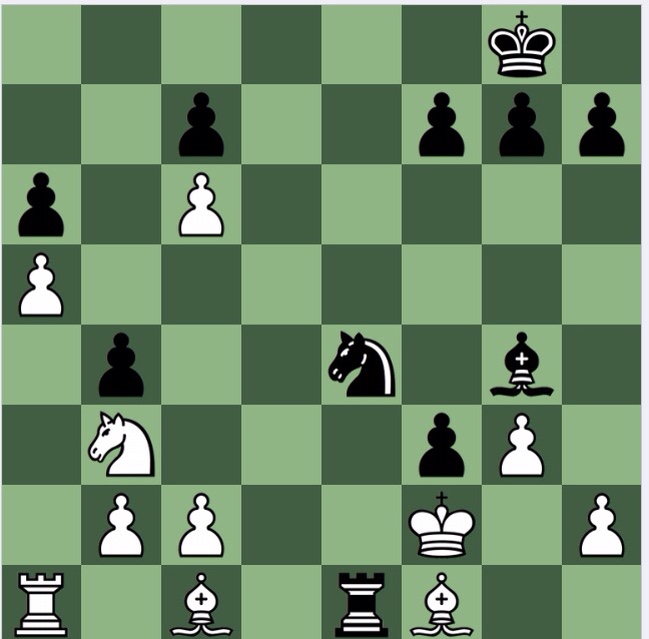
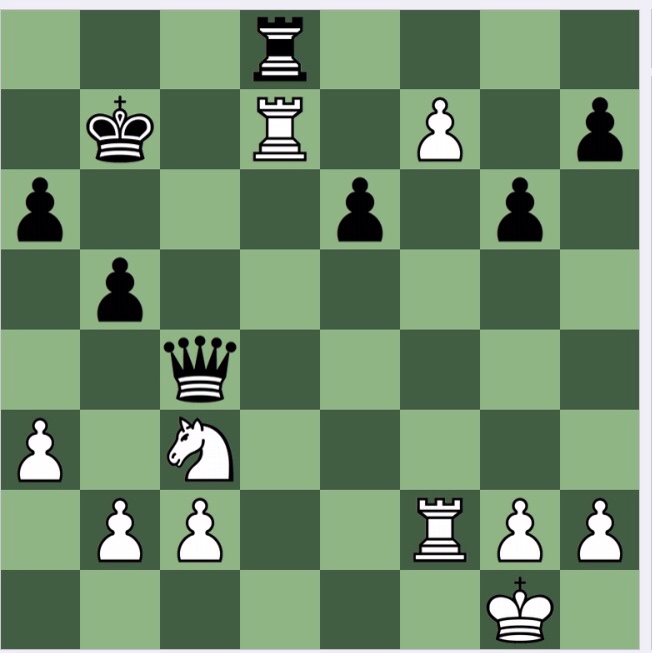
White to play and win
Solution
Not easy to see, but beautiful: 1 Be5+! Ke5 2 Qd6+! Kf6[] 3 e5…mate!
I wrote this blog without access to the Internet, nor without Teschner's book, so only now (back online) can I check what happened in the game. In fact White played 1 Qf8+ and the mating line was played in the game. White steered the game to the puzzle position by exploiting zugzwang, Black's last move being Rg8-g7, losing control over the f8 square.
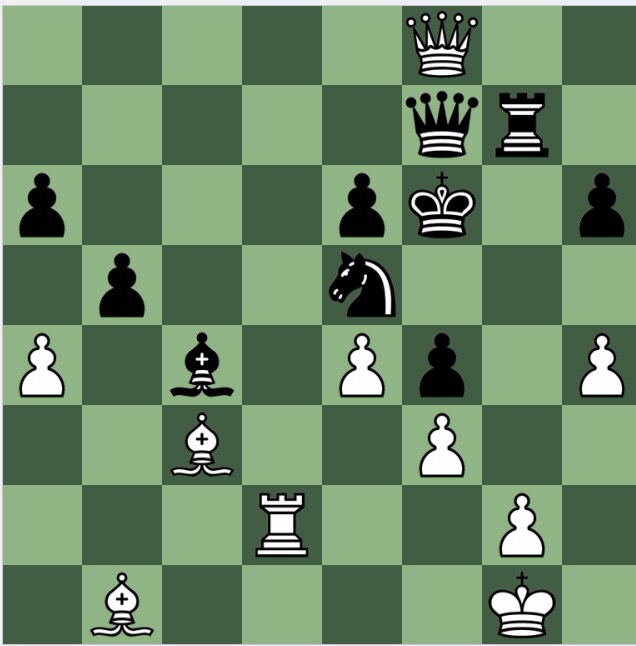
White to play and win
Lutikov v Tal, Kiev 1964-65
Solution
Another rest day, the most interesting thing about the position is who the loser is.
1 Qd8! Rd8[] 2 Rd7+ cleans up.
I do these daily postings for two reasons: in the perhaps forlorn hope of improving, by having a disciplined approach to chess tactics training, and for pleasure. This puzzle made me research White, Anatoly Lutikov, 1933-1989. He was from St Petersburg, a near contemporary of Mikhail Tal 1936-1992. If my quick count of their games is correct, he had a +2 score against Tal, and from a quick flick through some of their games, they were often highly entertaining. Tal Lutikov 1-0 1964 looks to be a truly fantastic game. I have never studied Tal, so only have a passing knowledge of his games, but I would suggest that a perusal of these two players games against each other would be instructive, and very entertaining.
White to play and win
Keres v Mardle, Hastings 1964-65
Solution
Examine all biffs, and quickly, or probably immediately, 1 Rf7! will come to mind. If 1..Qf7 then 2 Bf7+ and 3 Qh4 1-0, or if 1…Rf7 2 Rf1 and 1-0 soon enough.
A rest day today.
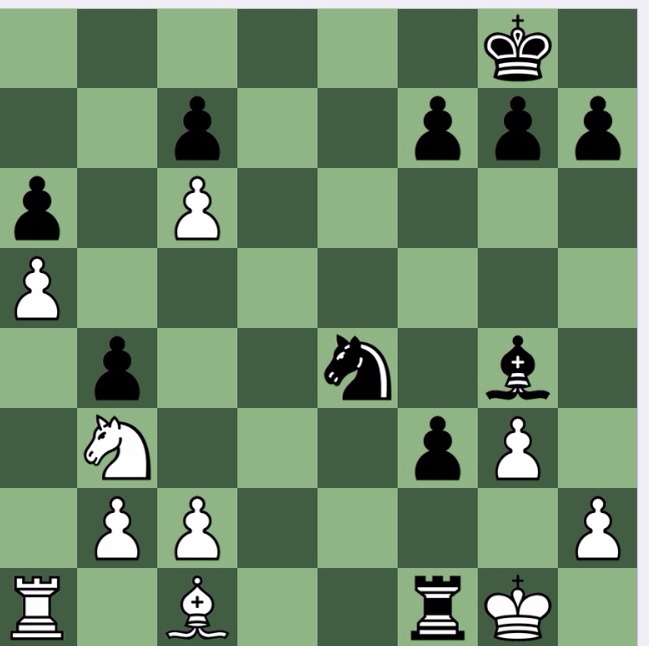
Black to play and win
Uhlmann v Yanofsky, Tel Aviv 1964
Solution
This one took me a good while- half a dog walk- before it dawned on me that I was missing something simple. 1…Be5! is a natural biff, aiming also at 2 Bf4 mate, but it took me a while to see that after 2 Rd7+[] Kany 3 f4[] that after the pawn is captured, Black can take the now LPDO Bb6. I had missed that the B was a LPDO once the rook has moved.
In Purdy's terms, examine all biffs and looking for pins, nets and ties, is the key here. The White King is in s net, and the White Rook is tied to defending the Bb6.
Black to play and win
Cevallos v Möhring,Tel Aviv 1964
Solution
Straightforward today, and with some similarities to Puzzle number 91; the motif is back rank, or back file, mate, with a sacrifice (and both rook sacrifices) being the enticing mechanism, drawing the king to the h file.
1….Rh1+! 2 Kh1[] Bf2 and White is helpless against 3…Rh8 mate.

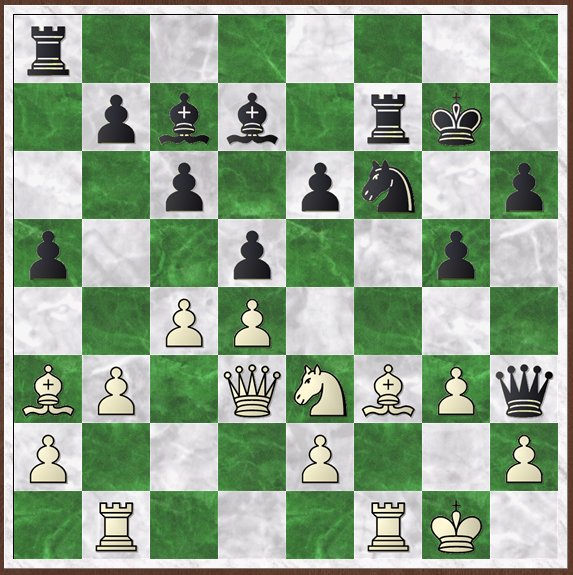
White to play and win
Mazzoni v Minaya, Tel Aviv 1964
Solution
I am writing this blog from my home in Turkey, where we've come for the summer (these blogs are typically written days or weeks in advance). I chose not to bring the Teschner/Miles book, preferring to leave it at our main home, rather than risk the horrendous consequences on losing the book en route or leaving it behind in Turkey. I say all this because I don't know what the book gives as a solution, since many moves win. I couldn't choose between 1 Nf6+ and 1 Ng7, eventually settling on the latter, whilst Stockfish prefers the former- although both moves have a stratospheric assessment, +7 or more.
This is one where you take your choice. By perfect computer moves 1 Nf6+ tends to lead to forced mate, but 1 Ng7 is I think more human.
Black to play and win
Santa Cruz v Uhlmann, Havana 1964
Solution
Very similar to Puzzle number 90, the alignment of the Qa4 and LPDO Qg4 are the key to the combination- Purdy's jump-biff motif again.
1…d3! and if 2 cd Rb2+, and the R can't be taken, else 3 …c3+ discovers an attack on the LPDO. If 2 c3 then 2…Qc2+ and 3…Qb2 mate.
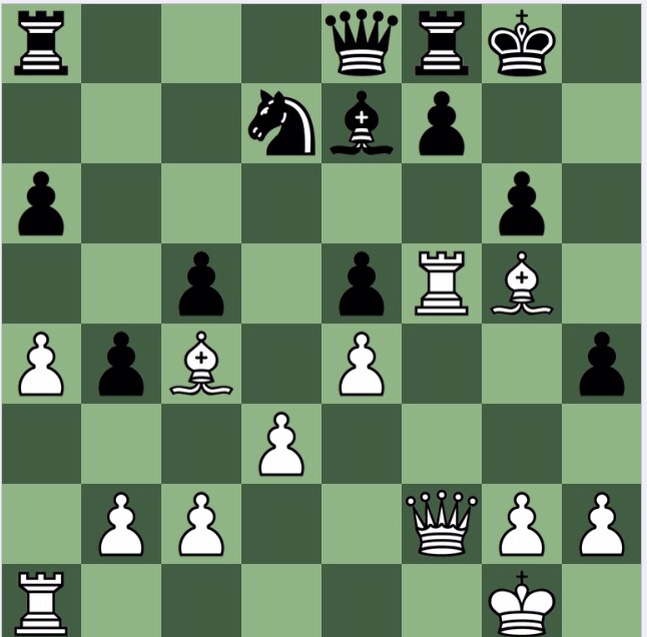
White to play and win
Lengyel v Pogats, Budapest 1964
Solution
A nice variation on a stand theme: the natural aim is to trap Black’s queen, which is in a bit of a net, but soon entrapment is seen not to be possible. But then the jump biff Rf1-f7 is seen, and 1 Bg4! Ng4[] 2 Rf7+
with mate to follow. If 2…Kf7 (2…Kg8 3 Qh7 mate) 3 Qh7+ and if 3…Ke8, 4 Qf8 mate, or if 3…Kf6, the optically nice 4 Be7+ is mate.