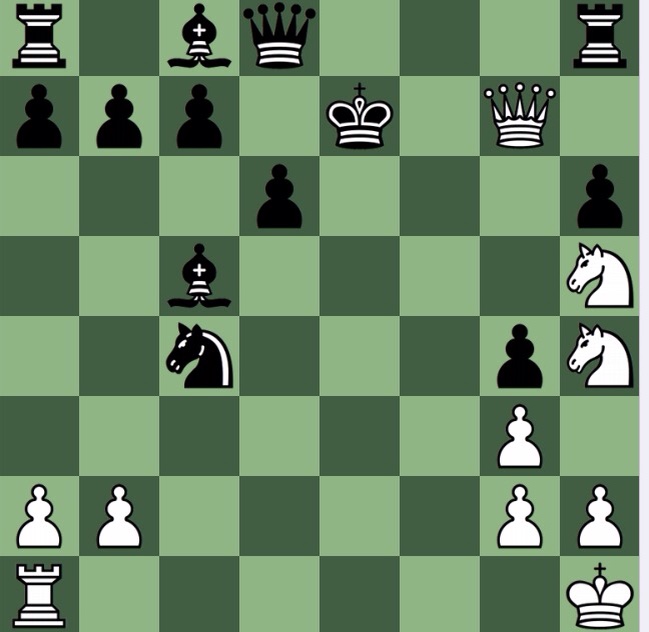
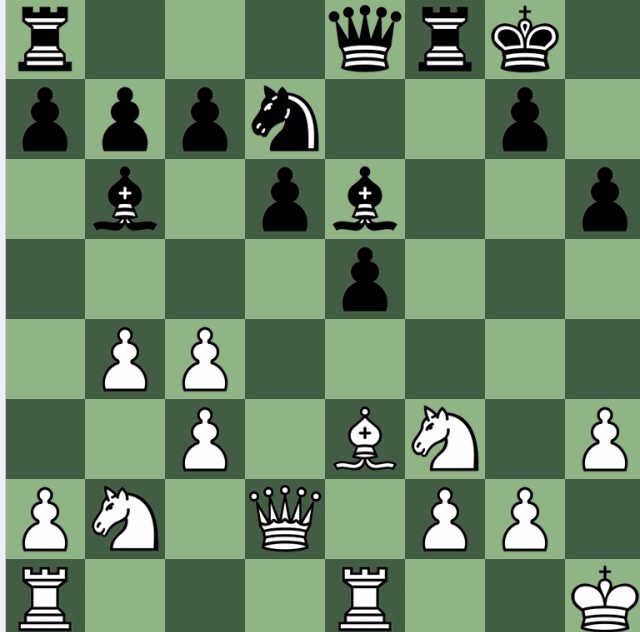
White to play and win
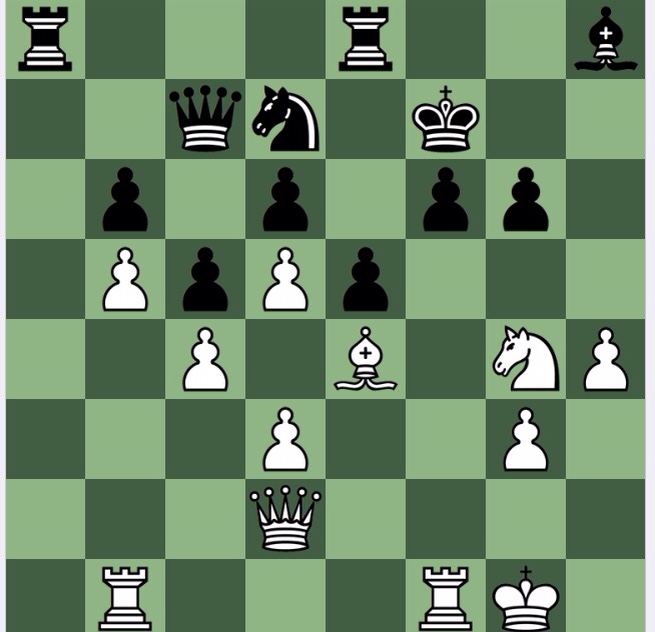
S Galleid v K O'Sullivan 1981
Solution
After yesterday's toughie, today's is more straightforward, just an exercise in calculation to see if the obvious sacrifice 1 Bg6+! wins. It is not too hard, but nor trivial, to see that it is.
Firstly, if black doesn't play 1…Kg6, say by playing 1…Ke7, then 2 Be8 and the material advantage will tell. So 1…Kg6 2 Qh6+ Kf7[] 3 Qh7+ and either the Bh8 drops off (after 3…Kf8) or 3…Bg7 4 Nh6+ and it still falls (4…Kf8 5 Qg8+ etc).
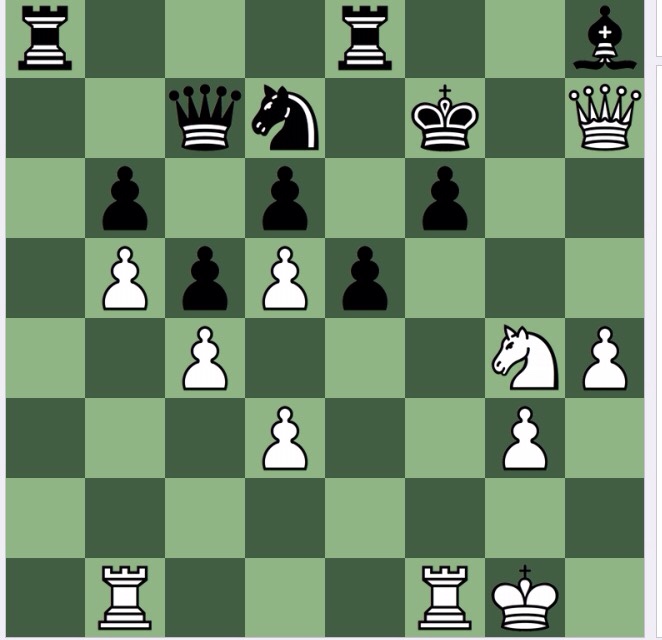
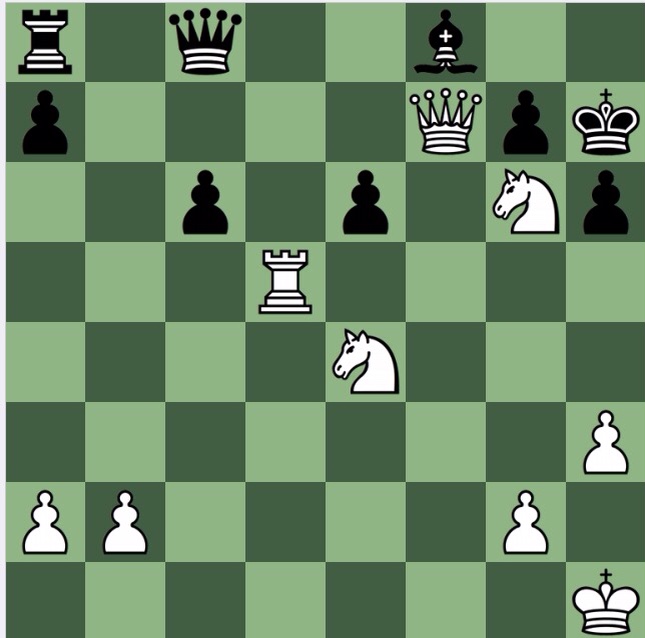
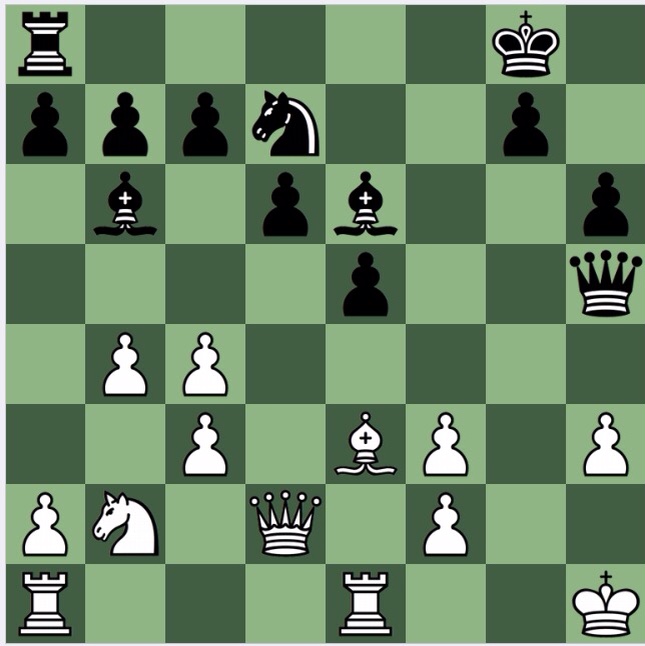
White to play and win
…after black plays 1…a5
(Hard, but worth pursuing)
KF Kirby v JW Eriksen 1953
Solution
In enjoyed this one, and it took one of the standard units of measure, a full dog walk to solve it, but when I did, it was a pleasing moment.
First, imagine you were at your local club, and you were kibitzing some analysis, and were asked 'which side would you take?'. I would take Black, presuming, as Black did in the game, that the a pawn would decide the game, with black's Q and R keeping white's pieces contained.
But 1…a5 is a gross mistake, whereas 1…g5 would have contained things.
So, 2 f4! is surprisingly powerful.
The easiest line to see is 2…ef, when it is quite an enjoyable task to see enough lines to convince oneself that black is defeated: he is more or less in a mating net. 3 Rd5! 4 Bd4+ and depending on how black defends, white has four pieces in the attack against a defenceless king. Go figure. (An expression I learnt somewhere, and seems appropriate, since there are too many variations.
Reitstein only goes 2…ef, 2…Qf4?? (which loses trivially- 3 Bh4+ and the Q drops off) and 2..a4? which is also fairly trivial, since 3 fe+ and, again, all white's four pieces pounce on the king. The line which took a lot of my dog walk was 2…e4 which keeps the lines closed, but eventually I became convinced that 3 Rd5 and 4 Bd4+ are nearly as good. The engine of course shows all black's choices as equally bad, and quickly turns to 'mate in…' but in practice 2…e4 gives white chances to go wrong. Again, go figure, or this could be a position to play as white vs an engine.
In the game, black played 2..a4 but lost soon after 3 fe+ Ke6 4 Bh3+ Ke7 5 Rc8+ etc.
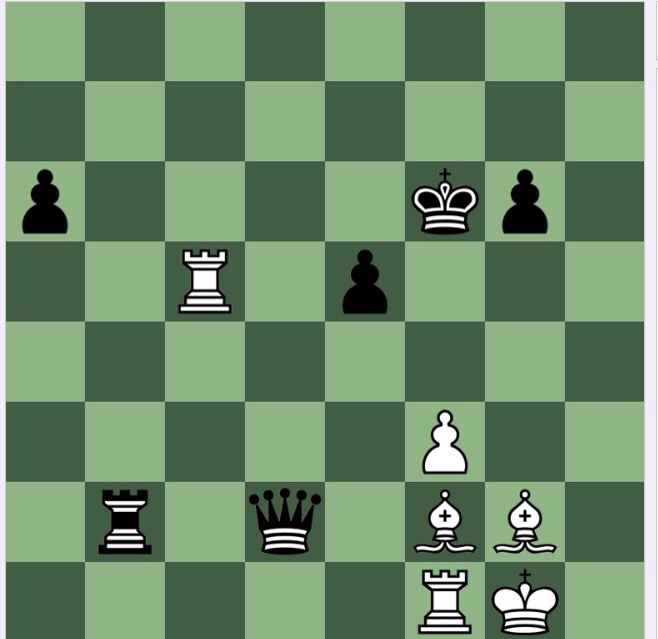
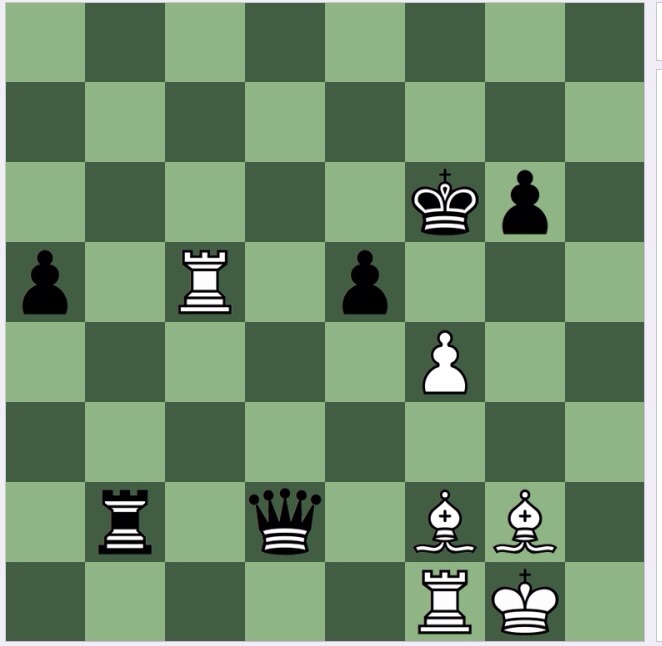
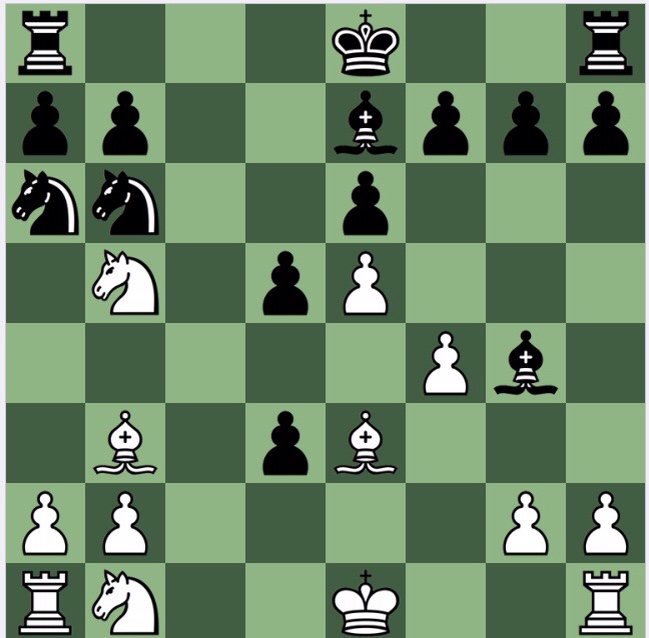
Black to play and win
JC Meintjies v J-P Labuschagne 2004
Solution
The motif is clear, of forcing through a pawn to the first rank, at all cost. So 1…Rc4+! 2 Rc4 Bc4 is not too hard, and the N can't restrain both pawns: 0-1.
Or, 1…e2 is just as good, reversing the move order.
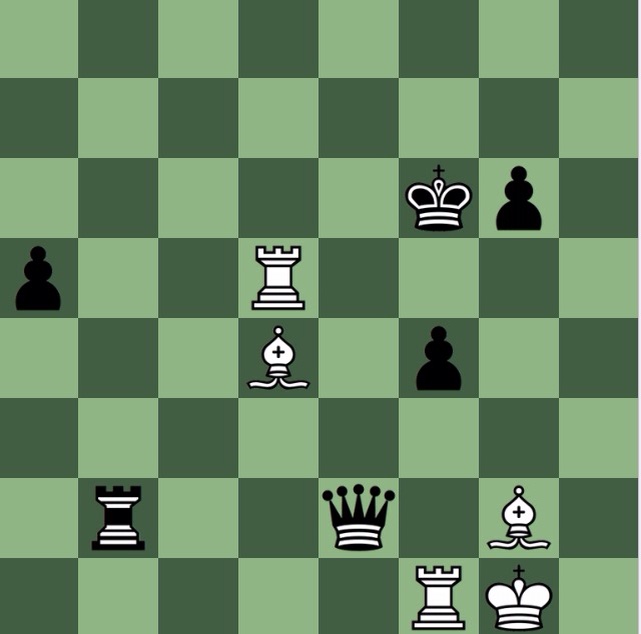
White to play and win
M De Ponte v G Lawrence 1974
Solution
Examine all biffs yet again, 1 Rf7! Kf7[] 2 Qg6+ Ke7 3 Qg7+! (to keep the black king from running away) 1-0.
White to play and win

KT Solomon v MC Jeoffreys 1997
Solution
Easy today: examine all biffs*3: 1 Qh7+ Nh7[] 2 Bh7+ Kh8[] 3 Ng6 mate.

White to play and win

D Gluckman v SH Bhawoodien 2005
Solution
Nice, but not too hard today. 1 Ng6+ (examine all biffs) Kh7[] 2 Rd5 (examine all biffs, again) and if the rook is captured, 3 Nf6 mate.
Or, 1 Rd5 with the same idea of 2 Ng6+ and 3 Nf6 mate.
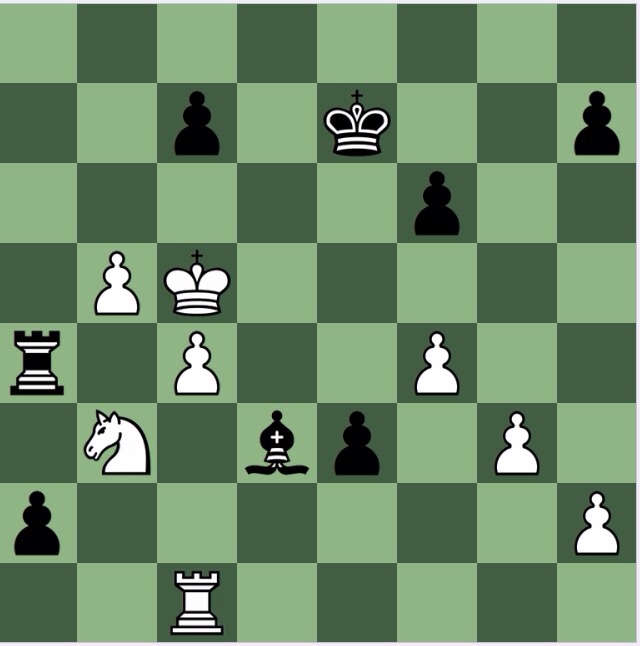
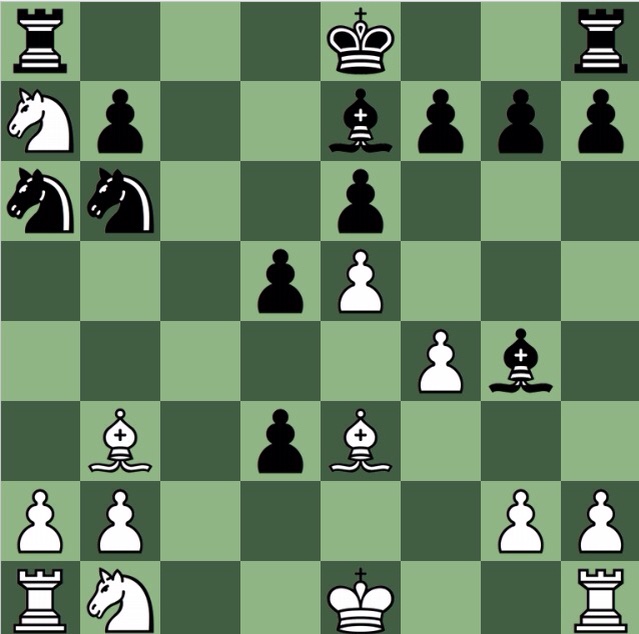
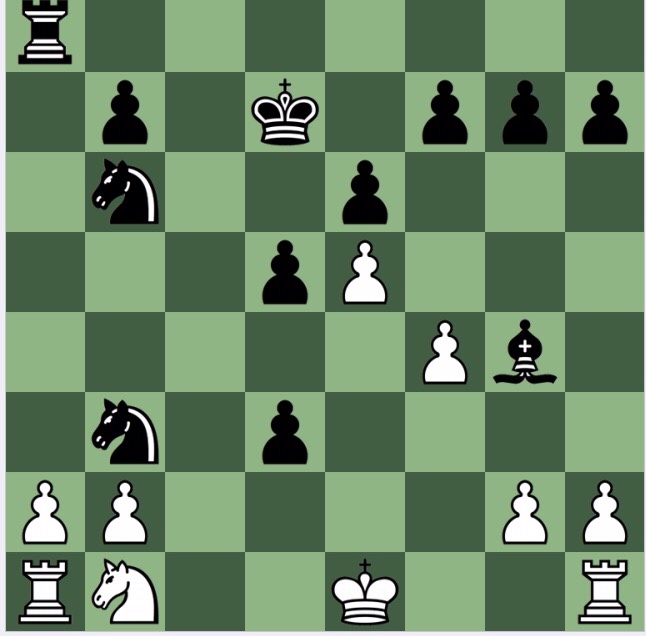
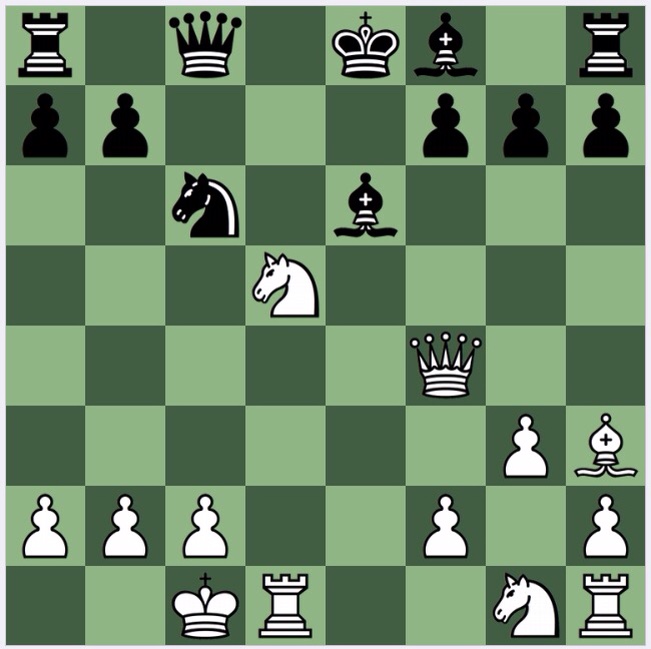
Black to play and win : white played 1 Na7 in this position. How does black respond?
M O Sullivan v G De Marigny 1981
Solution
1 Na7 opens the a file for black's took, and a Purdy player would note the jump biff Ra8-Ra1: it means the Bb3 might be a LPDO, not being protected by the Pa2.
With these thoughts in mind, 1…Bc5! comes to mind. The main line is then 2 Bc5 Nc5 3 Nb5 Nb3 exploiting the pin 4 Nc7+ K-somewhere (say d7) 5 Na8 Ra8 0-1.
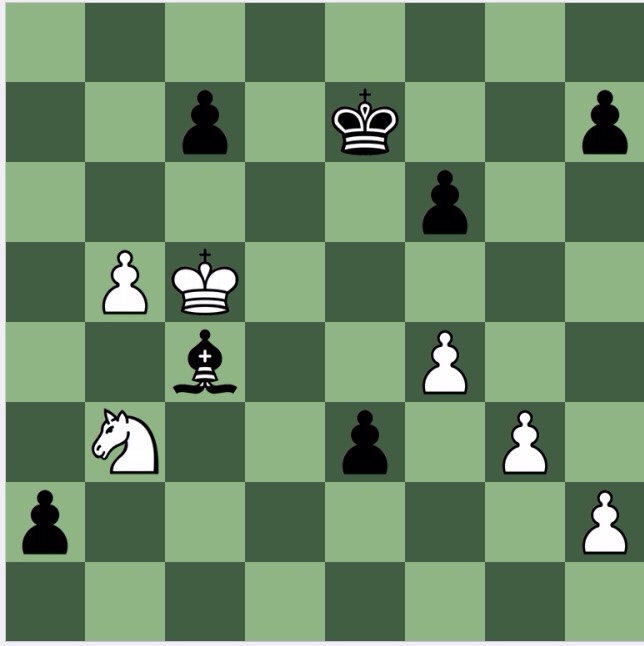
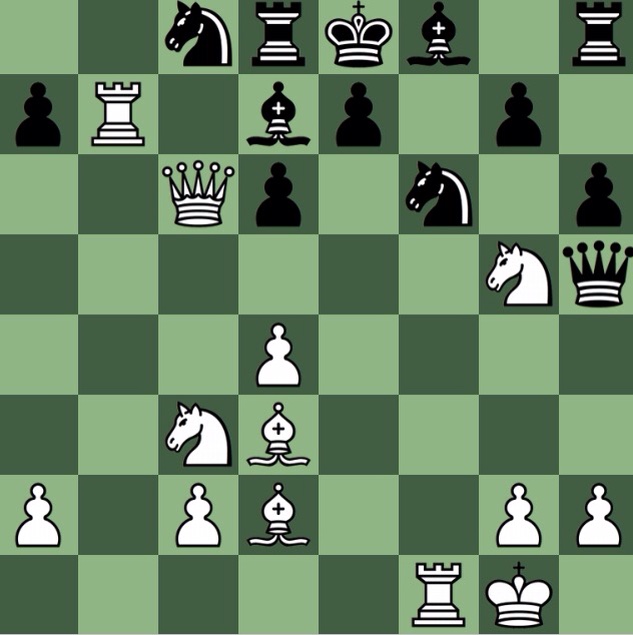
White to play and win
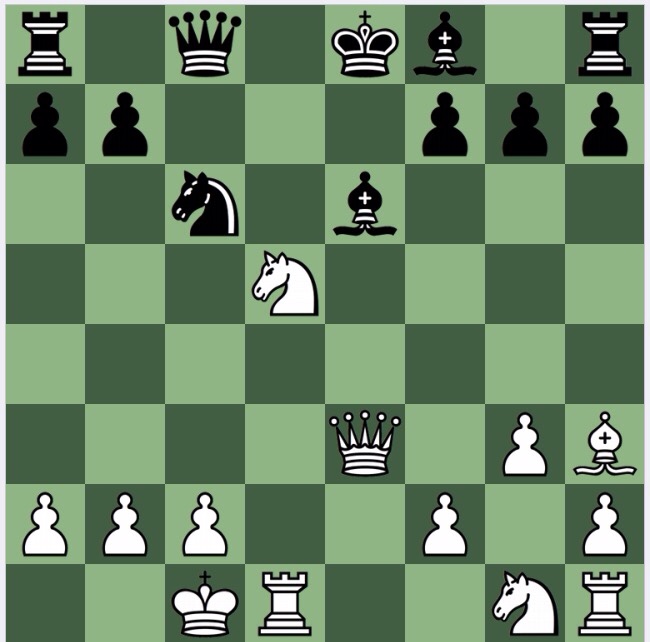
MC Harris v E de Klerk 1980
Solution
I failed on this one, not seeing the beautiful, wonderfully strong, winning move.
Alas, I also slipped up: after studying it for a while, I decided, as I sometimes so, to start drafting the blog post, and saving it, with the picture of the game position, to study later. I set my iPad Stockfish app to not show analysis, input the position, posted by blog in draft, and left it. Later, I reopened Stockfish, to input another position, and the app flashed the solution to the present problem. Once seen, it is obvious. Seeing it is anything but obvious.
I instead chose 1 f4, which, because white is: a pawn up, better developed, and with the safer king, also wins, or at least leads to a dominating position. Say 1…Be7 2 Be6 fe 3 Ne7 Ne7 4 Nf3. I would fancy my chances vs Carlsen.
Black to play and win
D Huysamen v KS Willenberg 2002
Solution
I think most good club players and above would instantly play 1..Rf3 (though 1…Bh3 is similar) and would be right to do so. After 2 gf Qh5 black is winning. I won't give lines, since they depend on white's various forelorn defences, but a Ra8-f8-f6 took lift would be standard.
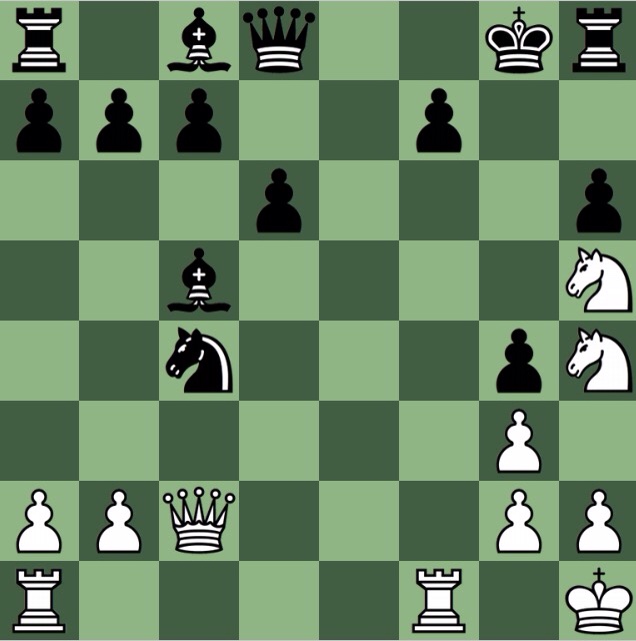
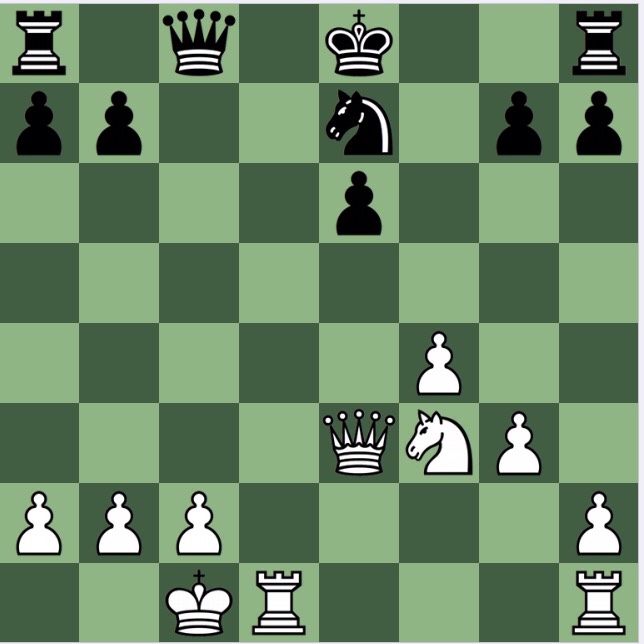
White to play and win
CC de Villiers v P Kroon 1995
Solution
Fairly straightforward today: examine all biffs leads to 1 Rd7, and if 1…Rd7 2 Qc8+ Rd8[] 3 Bb5+ Nd7[] 4 Bd7 mate. So 1…Nd7 2 Ne6 and Nc7 smothered mate follows. Or 1..hg 2 Rd6+ Nd7 and 3 Bg6+ wins the queen.
