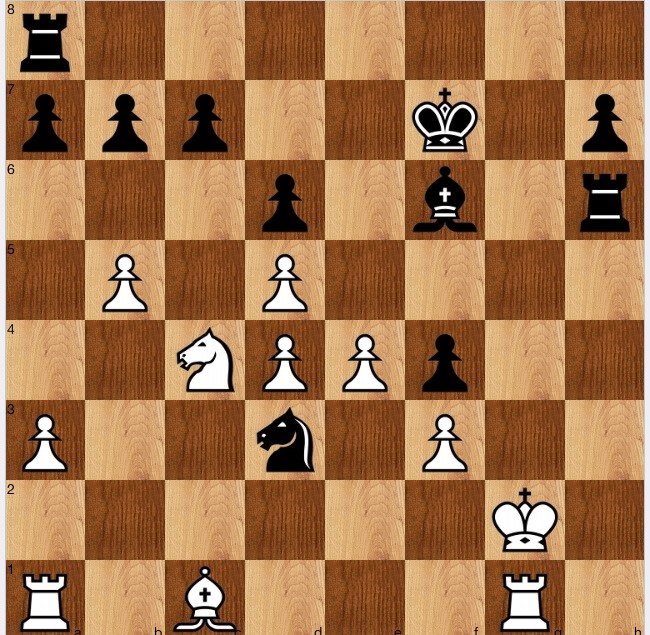
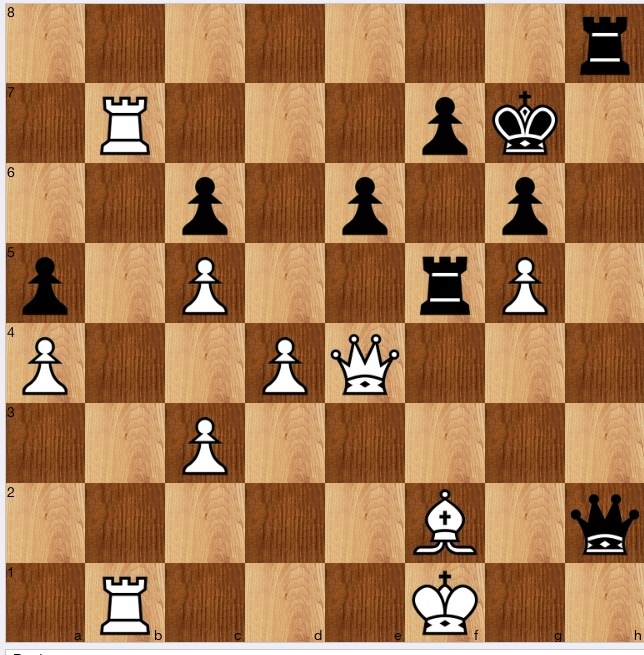
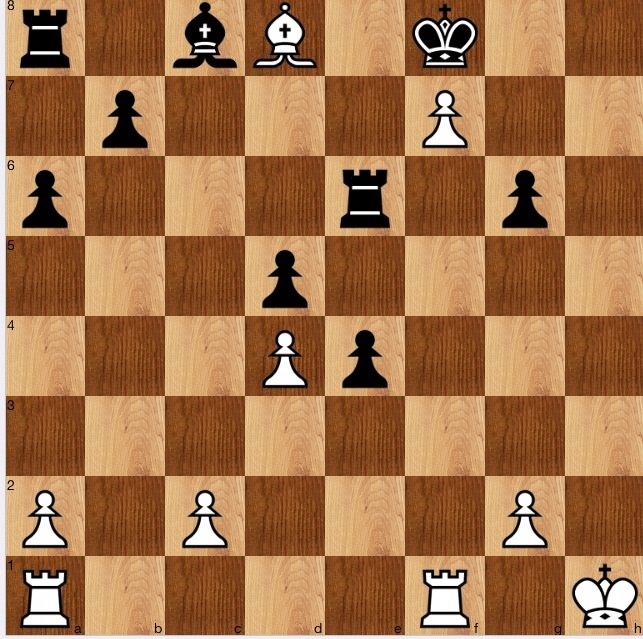
Black to play and win
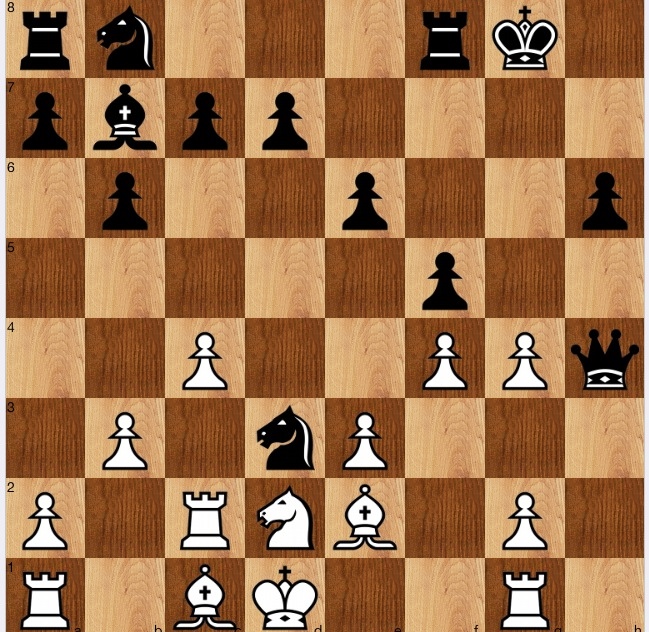
G Baillie v W Berson 1981
Solution
A rest day today: 1…Qe1+ 2 Re1[] Nf2 mate is a standard smothered mate, albeit not in a corner of the board.
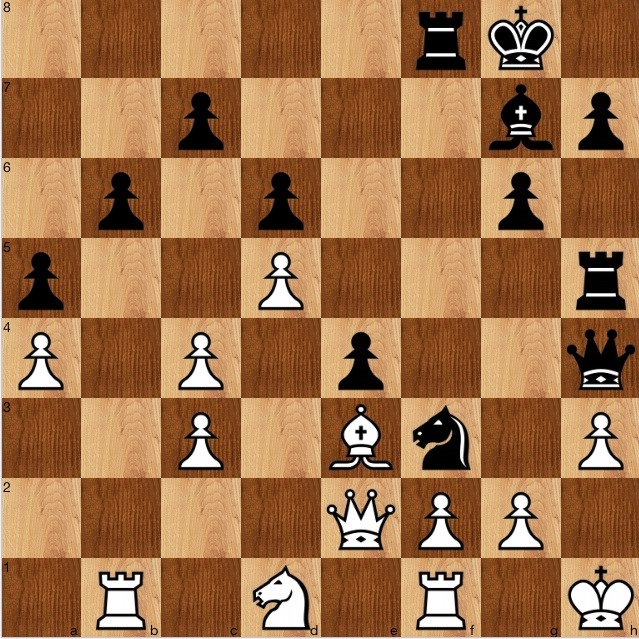
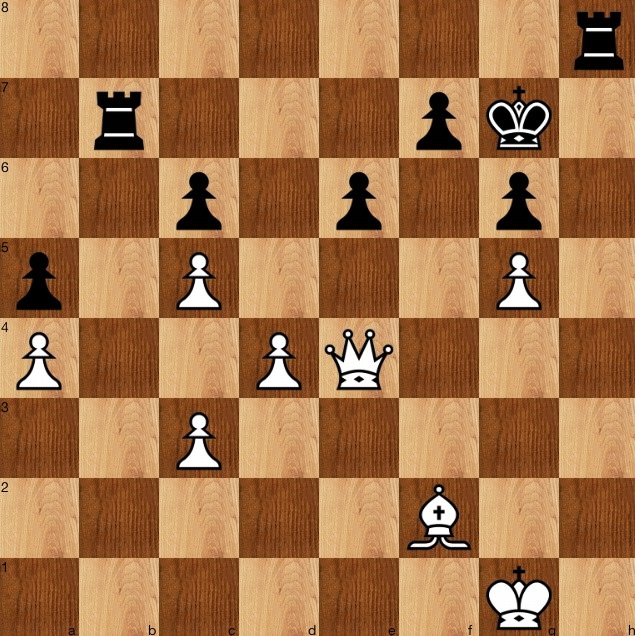
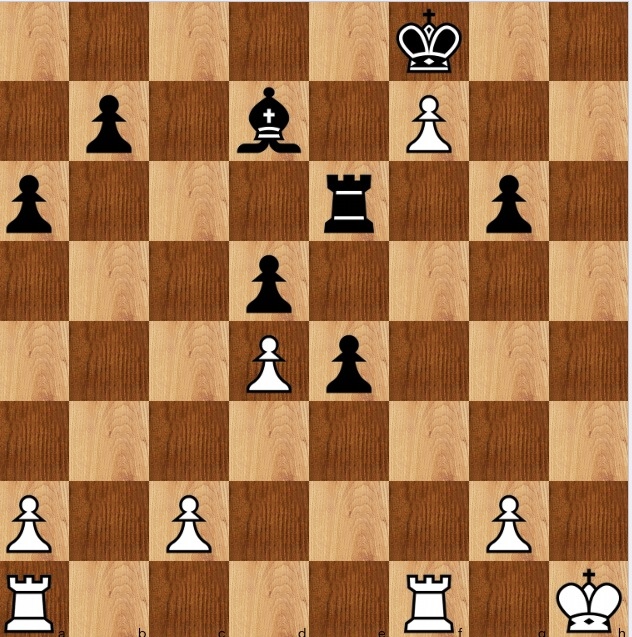
Black to play and win
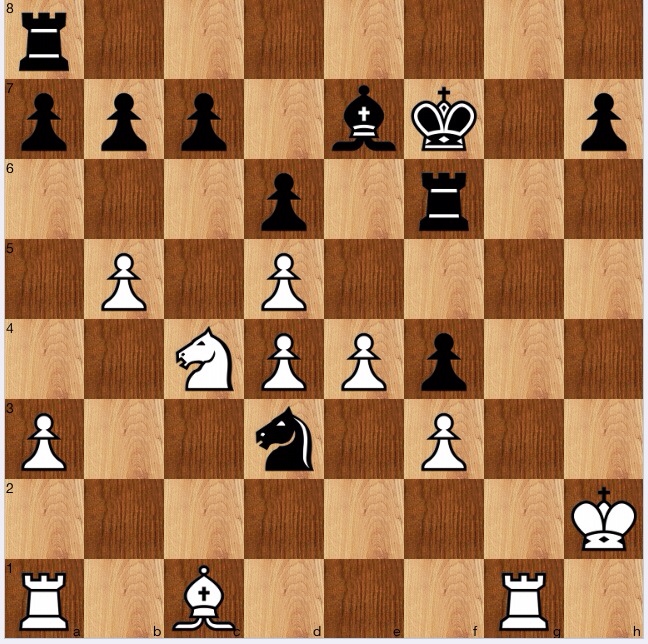
A Price v H Goldberg 1976
Solution
When writing this blog series, I have chosen not to give the text which Reitstein includes for each problem, partly because in some way they are hints. For this problem, the hint 'misled' me, at least in the sense of engine rating.
The text was:
How does Black take advantage of his opponent's exposed king? Goldberg solved this problem with his next move. What did he play?
This, to my mind at least, implied a startling move, and I quickly landed on 1…Ne1! which wins. In the game white played 2 Re1? which was met by the main point of Ne1, namely 2…Rg8! when Rh6 can't be avoided (it can be deferred by Bf4, but only deferred).
White has a better defence, 2 Rg4, when 2…Nf3+ 3 Kh3 Nd4 4 Rf4 Ne2 is gruesome, due to white's uncoordinated pieces as much as his pawn deficit.
So, satisfied, I checked the book's solution, and was happy, and then I entered the position into Stockfishin order to write this blog.
Shock: the engine's clear preference was 1…Rh6+!; whilst is assesses the position after 4…Ne2 as winning, its numerical assessment of 1…Rh6+! is far higher.
Of course, the engine is right (’as always'). After 2 Kg2[] Bf6 white is in a curious bind, and against sensible tries the B gets to d4, after which Rg8+ comes next with terrifying force.
Once the engine showed me the move, I understood why. In my line, white's response Rg4 hits f4, and gives more possibilities of defence. The check on move 1 forces the king to block the rook, giving white a more passive position, and his tangled pieces can't organise a defence.
Interesting and instructive.
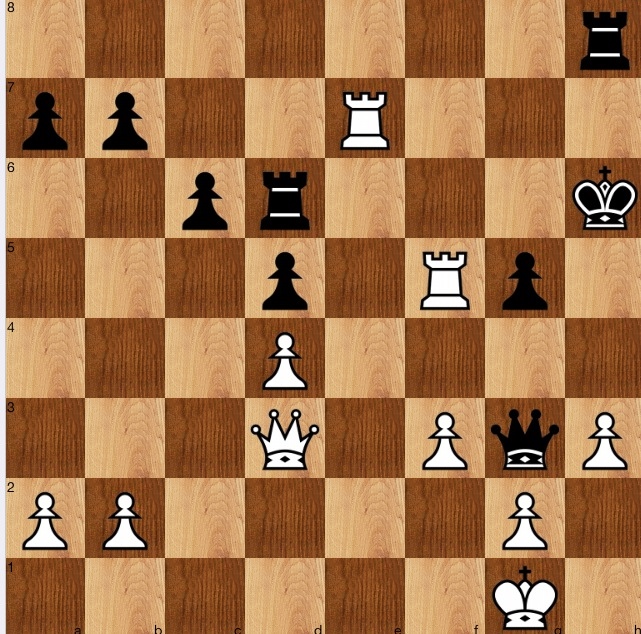
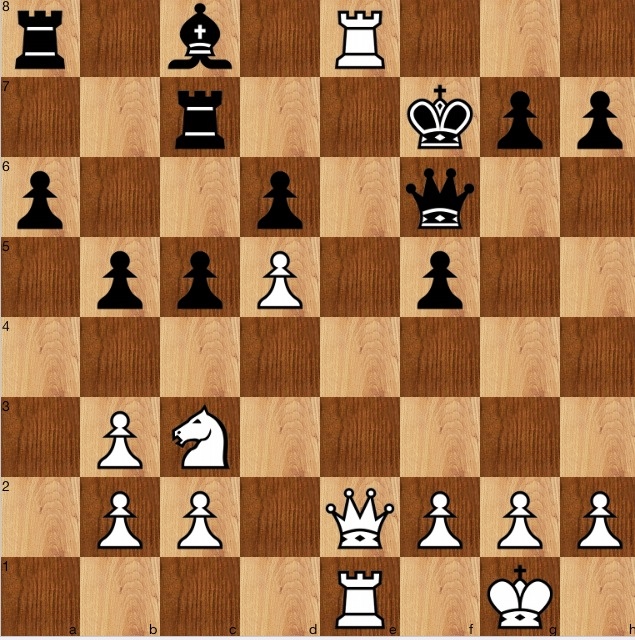
Black to play and win
DV Barrett v CCA de Villiers 1974
Solution
I felt pretty pleased with myself until, when writing up this blog, I entered the start position into Stockfish.
1…Qh3+! was my solution and was also the game continuation, and it is not too hard to see that it is forced mate. 2 gh[] Rh3+ 3 Kg2[] Rh2+ 4 Kg3[] Be5+ 5 Bf4 Bf4+ 6 Kg4[] h5 mate.
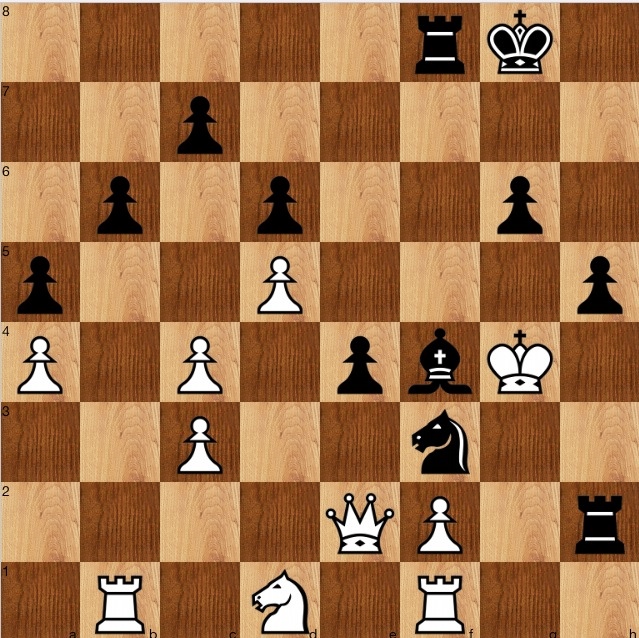
Not too hard, especially since it is virtually a single track line.
However, Stockfish immediately flashed 1….Qg4! and as soon as I saw it, it was obvious that it was even faster.
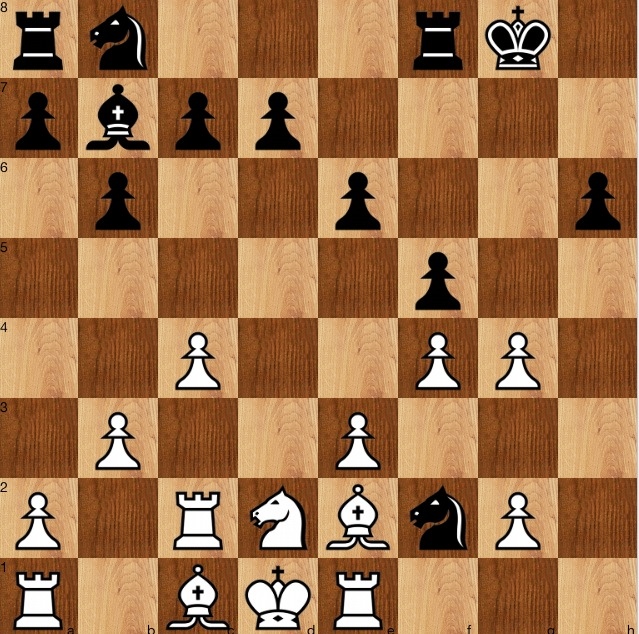
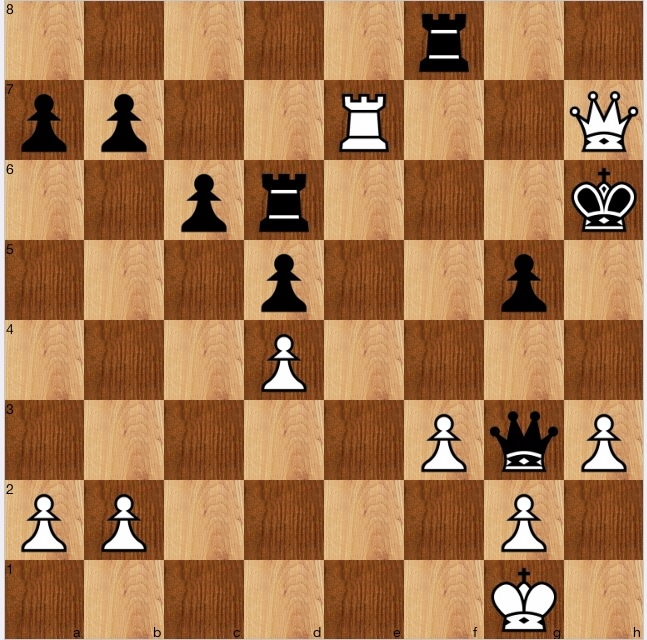
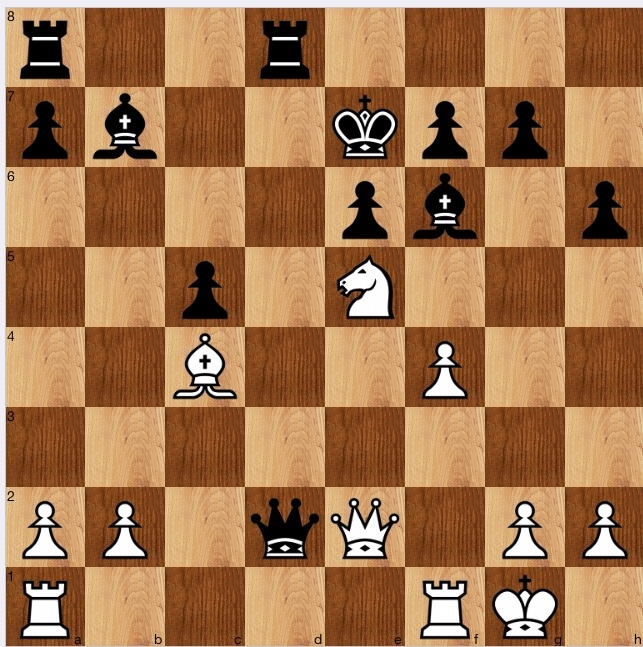
White to play and win
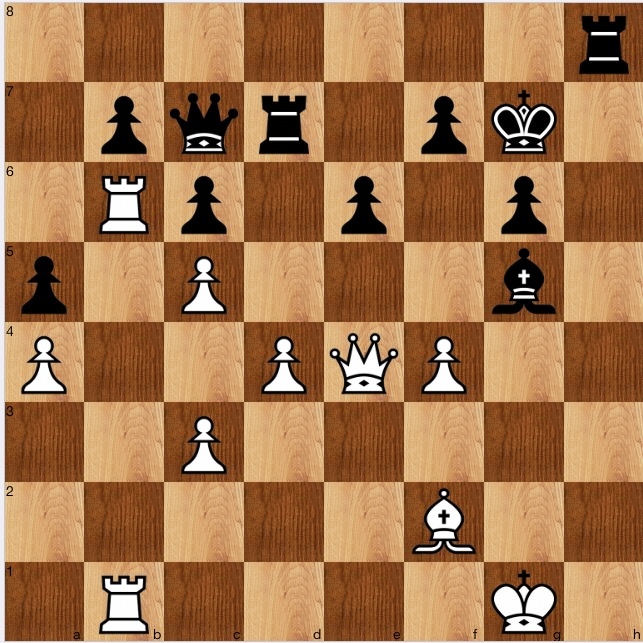
Black's last move, the last move before the time control, was Bf6*g5.
W Heidenfeld v KV Grivainis 1957
Solution
Fairly straightforward, I think. If it were a time scramble, then maybe you would play 1 fg?, but with time to think, I think most players would be cautious about freeing the black pieces: 1…Qh2+ 2 Kf1[] Rd5 and 3…Rf5, and white is better, but the game still has to be won.
So, better the zwischenzug 1 Rb7! (I saw this immediately, but had it not been obvious, Purdy's consider all biffs would have included fg, Qg6+?? Qc6+?? Rc6?? and Rb7) which takes the wind out of black's sails. Two rooks and a queen come off, then the bishop, and the win is trivial thereafter. Either the c6 pawn will drop off, and the pawns roll, or the Bf2 will be activated, and it will be murder on the dark squares.
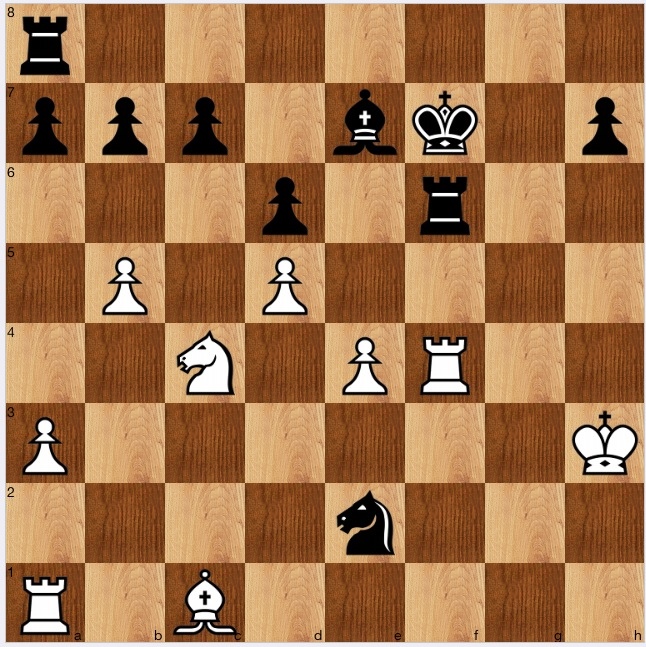
White to play and win
M Rieck v JM Holford 1946
Solution
A nice problem, which took me a few minutes to solve. First, I tried 'obvious' moves like 1 Rff7 (which is met by 1…Rg6) and 1 Rf6+?? before analysing, and applying Purdy's techniques, realising that the Rh8 is tied to defending h7. Then, the solution came to me: 1 Rf8! and if 1…Rf8 2 Qh7 mate, or 1…Rd8 2 Rd8 Rd8 3 Qh7 mate.
Nice.
White to play and win

A Southey v H Morkel 1975
Solution
1 Qg6+ is obvious (at least since it is a puzzle: in the game, white missed it) when 1…fg[] 2 f7+ Kf8[] 3 Bd8
The f7 pawn can't reach the promotion square, but white can win the exchange after 3…Bd7 4 Ba5 Kg7 5 Bb4 Rf8 6 Bf8+ Kf8.
White will win, perhaps slowly, but probably surely.
White to play and win
GH Hill v W Gerbee 1960
Solution
After trying Qe6+?? Qe7+?? Re7+??, the next biff to look at is 1 Rf8+! which is the solution. If black doesn't take the rook, playing 1…Kg6, then 2 Rf6+ and the game is over. If instead 1…Kf8 then 2 Qe8 mate.
White to play and win
K Dreyer v S Arsinowitz 1937
Solution
Not too hard, especially if you consider all biffs and look at 1 Ng6+.
Then, 1…fg leads to mate by 2 Qe6+ Kf8[] 3 Qf7mate.

Black's only other alternative is 1…Ke8 which loses the queen after 2 Bb5+ Rd7 3 Qd2, the pinned rook meaning that the queen is LPDO.
For more years than I can remember, I have loved the Dilbert cartoon strip.
Today's is funny:
White to play and win

CCA de Villiers v S Pearson 1981
Solution
Fairly straightforward today: 1 Qa6+ Ka6 2 b7 and mate can't be avoided. 2…gh+ 3 Kh1 is just a deferral, and if then 3…Ka7 4 b8(Q)+ Rb8 5 Ra1 mate.
