There is a lot of top class chess on at present, including the Russian Superfinal where I am hoping both Svidler and Kramnik will do will. Whilst in Bilbao, I am backing one player, Britain's number 1, Michael Adams. He has started well, with a win and two draws, so is presently in the lead.
His victory yesterday interested me.
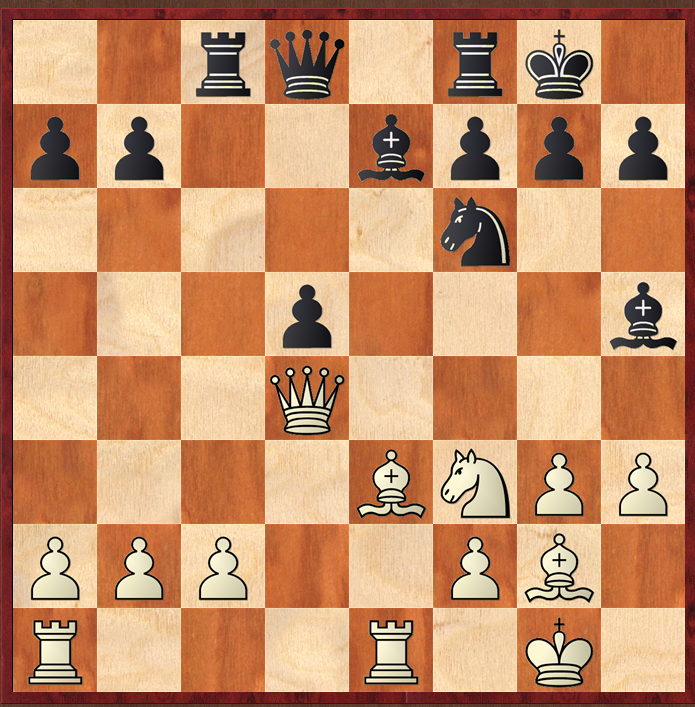
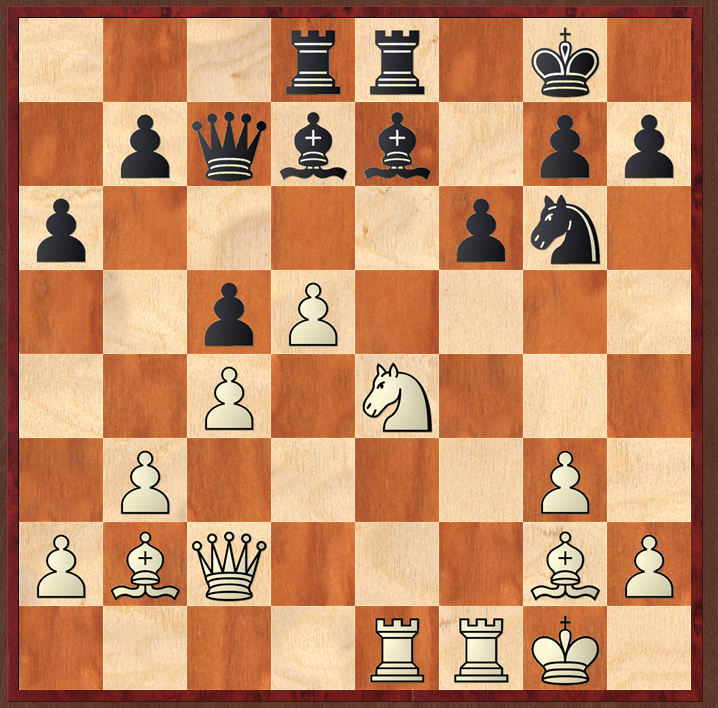
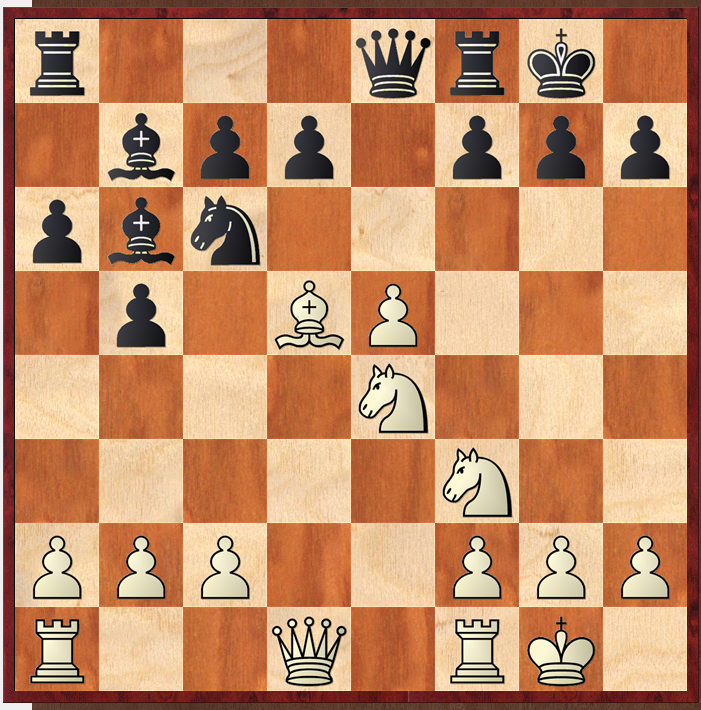
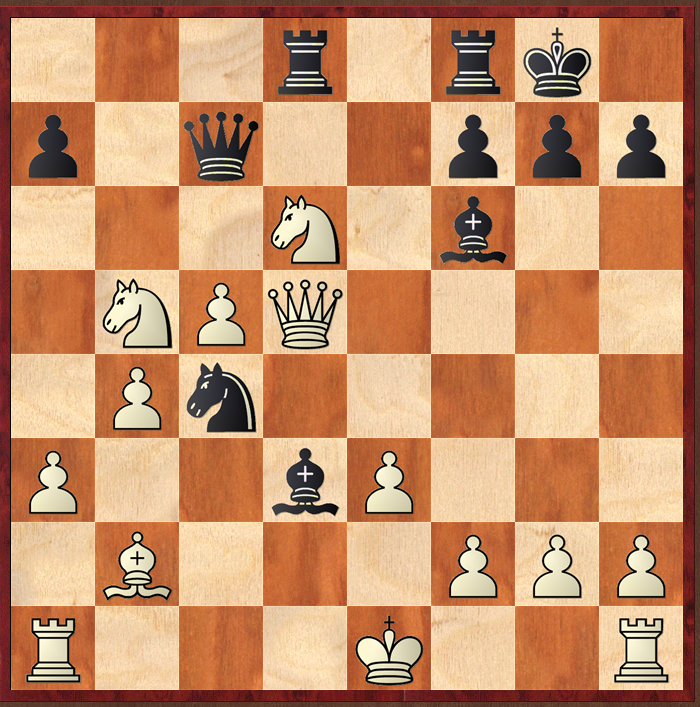
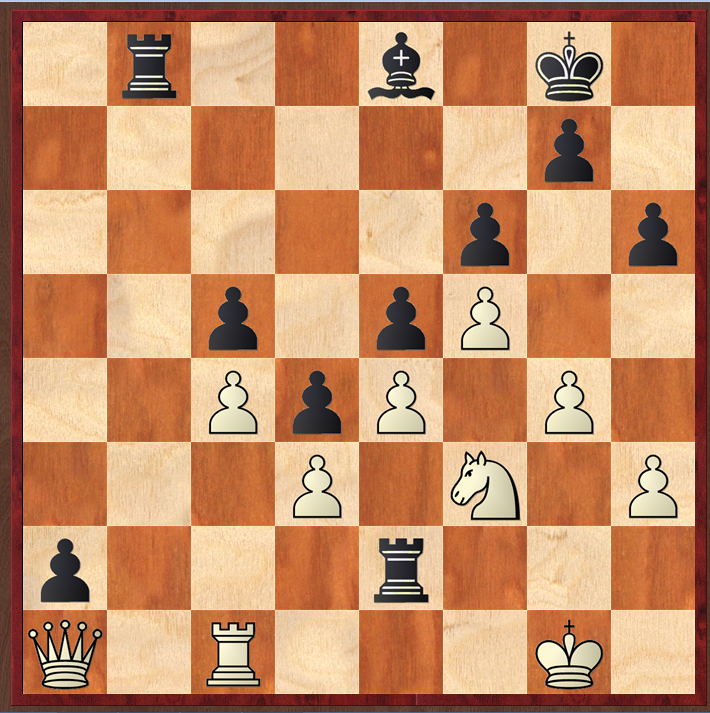
Black (Maxime Vachier-Lagrave) has just played Rac8, to which Mickey replied Bc1-e3. I think I would play, almost without thinking, c3, protecting my c pawn, but I do realise that my queen might be pushed somewhere: and also, I would only be protecting the c pawn as a knee-jerk reaction “it is threatened, therefore I defend it” whereas I know I should (following one of Purdy's maxims) always ignore the threat, and decide what I would like to do irrespective of the threat, and then decide if the threat must be met.
Had MVL taken on c2, Mickey would have taken on a7, and MVL then on b2. A temporary pawn sacrifice.
Mickey would then play Rb1, and the net effect is to give white a passed a-pawn, to black's passed d-pawn. Very clever.
So instead of taking on c2, MVL played Bc5, swapping the bishops off, and after further exchanges the following position was reached.

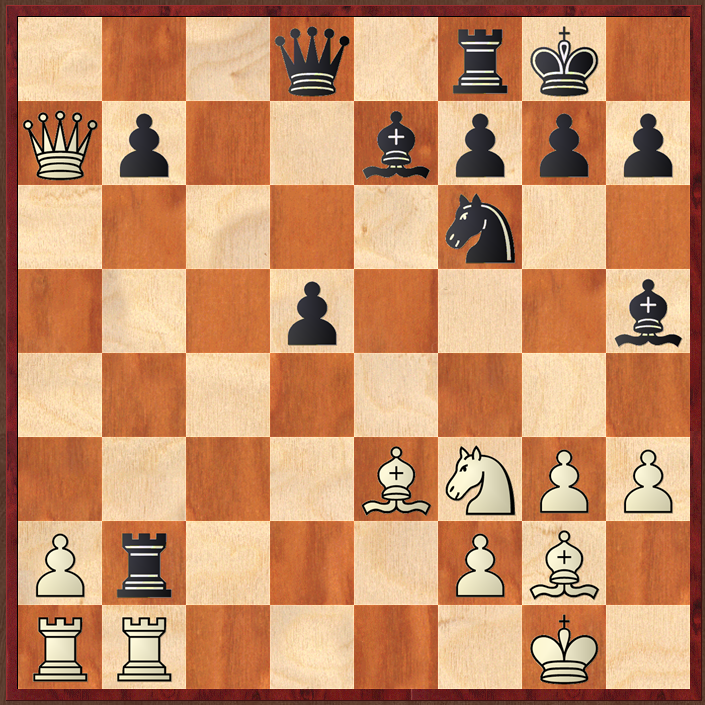
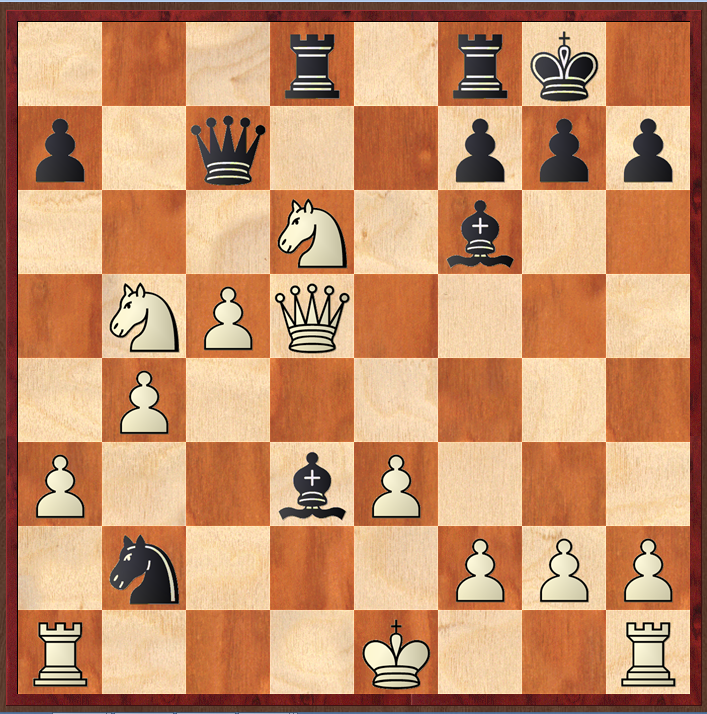
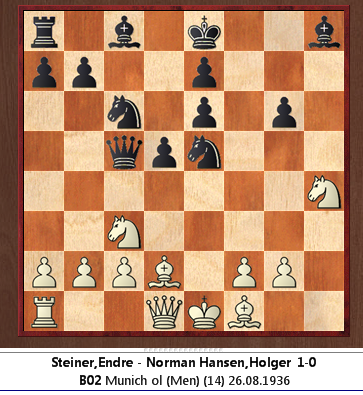
Mickey has an ever so slight advantage, which he nurtures, eventually winning a pawn and getting to this endgame.
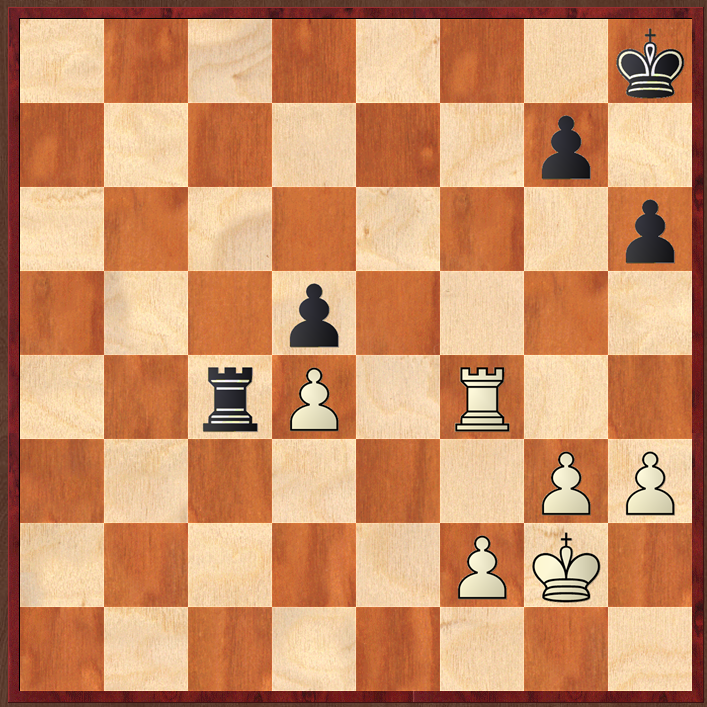
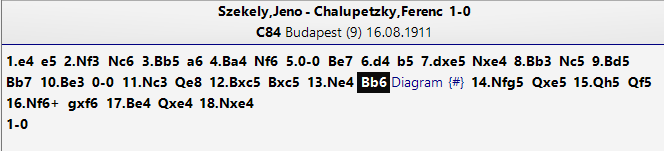
The final position, below, is strange: black resigned in the position below. Houdini gives it as 0.0 so I wonder if MVL lost on time after playing his fortieth move? I have not seen any report yet. I don't know whether it is drawn or not (I would say black is sufficiently active to hold the draw) but even if it were not, is the position resignable? I think not: hence I favour loss on time.
The result of the game is not the main reason for this posting. It is the endless variety of chess, and the interesting points that can be found in seemingly dry looking positions: especially when in the hands of such elite players as Mickey.
White to play and win
Solution
An easy one today. The move that immediately comes to mind is 1d6!: as in a previous blog, one of the most insightful pieces of chess writing ever was when Purdy used the phrase potassium cyanide for whenever two pieces are in pawn-fork juxtaposition: here, the Be7 and Qc7 are, with the d5 pawn in place to commit the poison.
So, 1…Bd6 is forced, when 2 Nf6+ is terminal.
White to play and win
(Don't spend too much time on: the problem is cooked. It is however a worthwhile calculation exercise)
Solution
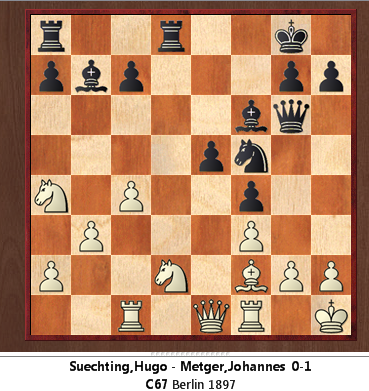
My solution was 1…Rd2 2 Qd2[] e4 3 fe Be4 with a monstrous position.: and indeed it is, except that 3 Qf4! is a far better defence, when the game is equal- in fact, a perpetual in one fairly forced line.
The game solution 'improved' with 2…Rd8? biffing the queen, forcing it away from f4, and white duly complied with 3 Qe1, when black has an advantage- but not a winning one, since white could have defended better later. However, the active 3 Qb4! is substantially better. By biffing the LPDO bishop white gets time to bring his knight back into the game, protecting e4, and by the strong manoeuvre Na4-c3-d5 white is clearly on top.

So, the problem is cooked, but is nevertheless a good exercise in calculation.
White to play and win
Solution
Lovely.
One of my favourite puzzles so far. I found it mystifyingly difficult, but resolved to solve it, and eventually did.
In a real game, I would play weakly, Qd2-d4, and hope a build up worked. Here, noting the LPDO Bb7, I even thought of 1 b4, but after 1…Rab8 it is black who has improved. Similarly, 1Rfe1 couldn't be a solution to a problem, for instance because 1…Na5 unfrees black. So I knew the moment had to be seized. I has previously looked at 1 Nf6+ but black takes and places 1…Qd8, and he is winning. So what could the move be?
I decided to refocus, and look for black's weakest point. It is h7, so 1Nfg5! then came to mind, for a second also thinking that the attack could be reinforced by Pf4, but of course the pawn is pinned, so it has to be a piece attack.
Firstly, the LPDO Bb7 is important here: the Nc6 is firmly pinned, so black can only capture with 1…Qe5. But then 2 Qh5 h6 3 Bf7+ and Qg6 is a standard mate. So 2..Qf5 was the only remaining move to defeat, and I am glad to see the idea of Nf6 and then Be4 came quickly enough: I think this combinatory motif is called a reloader.
For completeness, 1…h6 fails to 2Qh5. There is a fatal reloader if black takes the N, and otherwise there is the unstoppable threat of Qg6.
Finally, to cap it all, here was where I was when solving this, on a boat near Kekova, Turkey.

Black to play and win
(One worth spending time on: I couldn't solve it, but wish that I had)
Solution
Firstly, black could play 1…Nf6, and would be clearly better, but that is not a solution to a puzzle book problem.
Alas, I looked at 1…Nc3, 1…Nf2, 1…Rf8 and 1…Qh4: giving all my attention to 1…Qh4, but felt it wasn't quite good enough, and then, eventually, turned to the solution. I was really annoyed with myself for not seeing it: 1…Qf4!!. Same idea, hitting f2 and sometimes h2, but with the all important difference that it directly attacks f2 if the knight is captured. I imagine the f3 pawn shielded my view, but I am disappointed.
Nevertheless, an excellent puzzle.
Black to play and win
Solution
A rest day today. First move I thought of was 1…Bb2?, second, an instant later, 1…Nb2, and it is easy to see that it is game over. Very little to calculate today. Trying to find something interesting to add, I had a look at the full game score. It turns out that white missed a clear (and not hard to spot) win a couple of moves earlier.
Black to play and win (or does he?)
Solution
My first thought was 1..Qa2, but that enables white's queen to slip out to c5 via a3, when it is messy. So I settled on 1…Qb2 which I think is equivalent to the move played in the game, 1…a3: I think they transpose.
After either 1…a3 or 1…Qb2, white is trussed up on the back rank. But is it a win for black? I am not sure if I have the answer to that question, even after some analysis with Houdini. In the game, white blundered, and when I tried to play it as white against Houdini, I kept blundering too, but there does appear to be a very narrow path to achieve a draw. White seems just about able to avoid zugzwang: however, I am not sure, and don't really believe it, suspecting that it is a depth of field issue for the engine: I have spent some time on the ending, but not a great deal.
I may write more about this puzzle some other time: I have made a note to do so, if time can be found to analyse and understand why some moves seem to hold out.
White has a joyless task, to be sure, in the above position: it would be a good Aagaardian exercise to answer all its mysteries. For now, the attached game file gives my present analysis.
White to play and win
(Not worth spending too much time on: the problem is cooked, but that is not to say that looking at it is a worthless exercise)
Solution
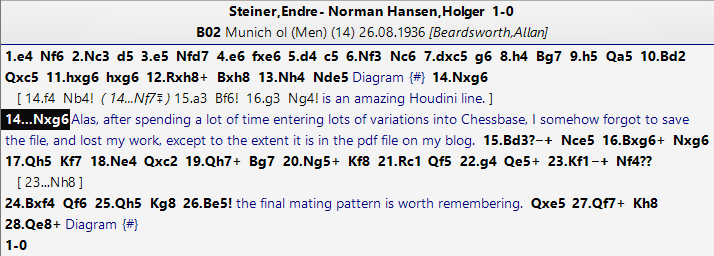
The problem is cooked. After a long line of only moves by black (none of which are hard to find) he blunders, and the game swings from won for him, to won for white. I did look at the game extensively, but alas forgot to save before exiting Chessbase, so all we have of my analysis is the attached PDF. I recommend it to my readers, since there is a lot to say about improvements for both sides.
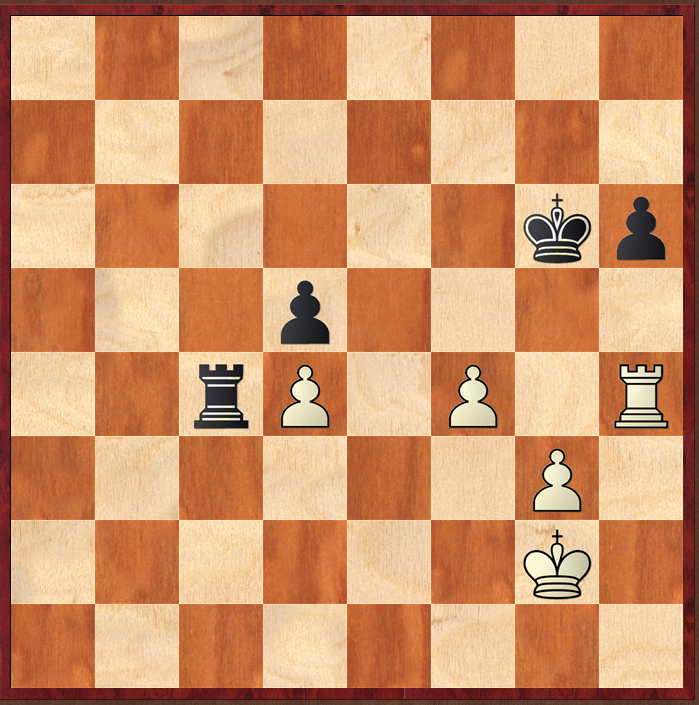
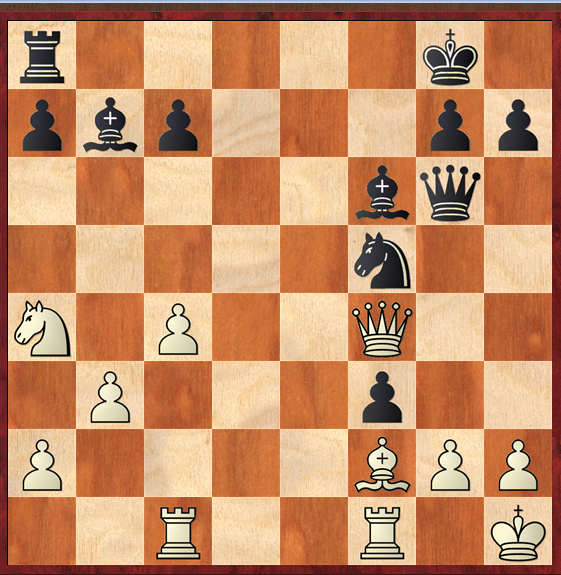
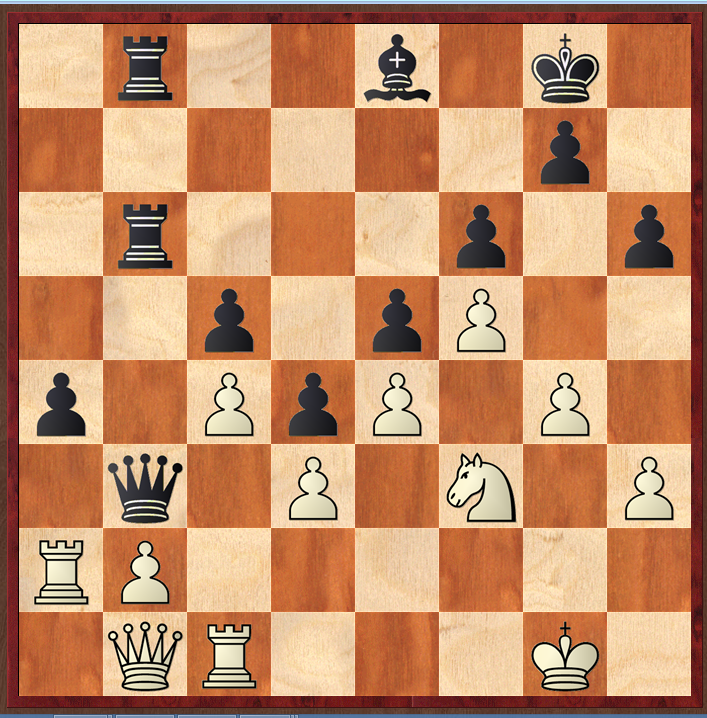
It is hard to criticise when writing in 2013 armed with an engine. The crucial mistake came in the diagram below, where Nh8 holds (and wins).
In the game, white's final combination is pretty, and a nice decoy worth remembering.
White to play and win
(Even if you 'know' the position, it is very well worth while solving it a fresh, and working out lines against black's alternative defences)
Solution
A famous position, instantly recognised, and I knew the solution involved Rh7+ and Qh1+. But the puzzle was hard for me.
The move my hand wanted to play was 1 Rd4, which would certainly be the move I would play in a game; and I would probably do with relatively little calculation. I would have also spent less time on this puzzle had I not known that Rh7+ comes into it, since black has spoilsport defences 1…Re7 or 1…h5. In view of these spoilsports, and whilst I knew that white was better after each, I spent a lot of time on (what I suspected was inferior) 1 Rh7+.
Basically, 1 Rh7+ loses; after 1…Kh7 2 Qh1+ Kg7 neither of white's checks, 3 Qh6+ or 3 Bh6+ are quite good enough of: Kf6 and black will muddle out; and the other check, 3 Bd4+ is clearly insufficient, as 3 Rd4.
When I look at such long, tactical lines, I always look for 'stepping stones': positions with some stability, perhaps at the end of a forcing sequence, where I can concentrate, and re establish in my mind where all the pieces are. One of my character flaws is that I want these stepping stones to be places of safety, by which I mean I like to be able to visualise how I can, if I want, I can bale out for a draw. Alas, I realised some years back that one thing which limited me as a teenage chessplayer was my fear of losing, and I too easily took draws: my school friend, team mate, and lifelong friend Nigel Short had far more fighting spirit and a stronger will to win.
Eventually, I gave up. In the line with 3 Qh6+, I was most afraid of black trapping my queen with Rh8: and the engines confirm my fear was right. So, I plumped somewhat reluctantly for 1 Rd4, since if 1…Nd4 2 Rh7+ 3 Qh1+ work far better, and checked the answer. I was surprised to see that 1 Rd4 was indeed played, and that Chigorin didn't try to defend staunchly with Re7: but it was the 1890s, I guess.
The part of the solution I didn't look at, to my pity, was how precisely to purse the attack after 1 Rd4, 2 Rh7+, 3 Qh1+: my judgement was that the control of the black diagonals, and also of the a2-g8 one, would either be terminal or require black to return at least an exchange: in fact, Cordingley's answer correctly shows that 4 Bh6+ is terminal, with a hard to see mate in the centre of the board after 4…Kf6 5 Qh4+ after which it is mate in two. However, 4 Qh6+ is also terminal, too.
A very worthwhile exercise.
Or is it?
If I were to name my favourite person whom I follow on Twitter, it is the economist Tim Harford. I am interested in most things that he writes about. One of these is that he often tweets about WTF Visualizations, a site which publicises bad usage of graphs to set out data.

I was interested in this billboard which is being run at various sites around Manchester at present.

(Alas, this is the best print I can get- the ad doesn't seem to be available on the Internet. Hopefully though it is clear enough to be legible). It purports to show that the advertister's site is twice as good as its big three competitors- I say twice, being an approximation based on height. Being less charitable to the advertiser, maybe it is trying to mislead the eye into thinking their site is three or four times the competitors (by square area) or being even less heritable, some cubic power, if the 'volume' of the vehicles are to be inferred.
The advert has small print saying where the data was sourced from, and where to go for more information, so I did just that. Their text is shown below, as is my bar chart showing the information more fairly.
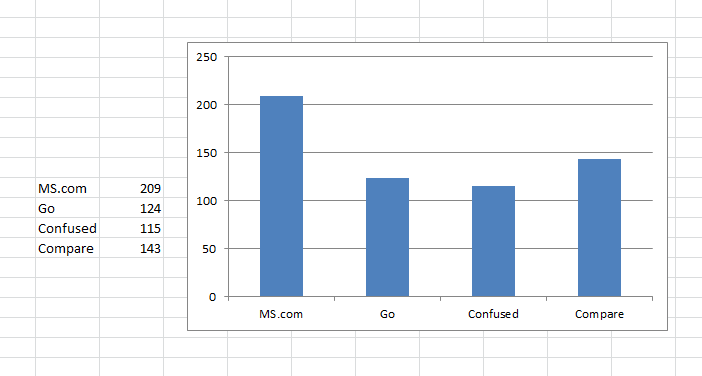
Yes, the advertiser comes out clear first based on the sample studied, but not to the extent which the eye is meant to read. In addition, the relative size of the others is also not entirely accurately stated.
I appreciate that the comparison site graphics aren't as misleading as the pie chart at the start of this blog, but they are at least to some extent.
An independent research agency, IPSOS Mori, independently created and validated the research method and carried out the research. The research consisted of 591 real consumers genuinely in the market for car insurance between May and July 2013. This survey was a representative sample of real consumers aged 18-65 years old. Consumers used all of the 4 leading price comparison websites (
,
,
and
) to obtain quotes for their car insurance. Each consumer used the 4 websites on the same day, using the same personal details, the same voluntary excess and payment approach etc. Those consumers who used all 4 leading price comparison websites were asked in a questionnaire 'Which Comparison site supplied the cheapest quote to you today?' with the results based on the answer to this question. The following shows the number of consumers who found the cheapest quote on each of the 4 leading price comparison websites between May and July 2013.
= 209 customers,
= 143 customers,
= 124,
= 115, total = 591.
