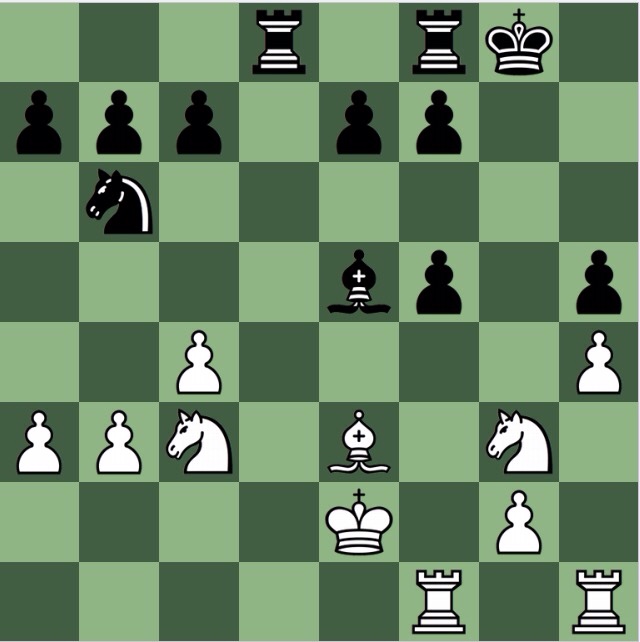
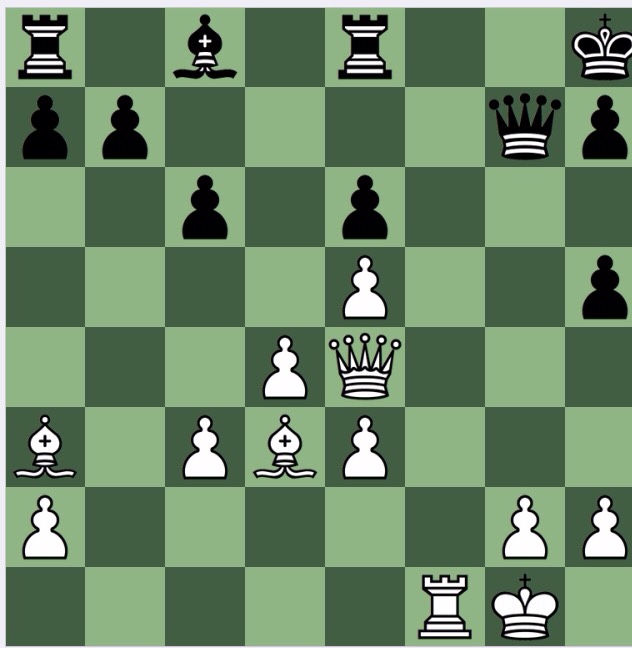
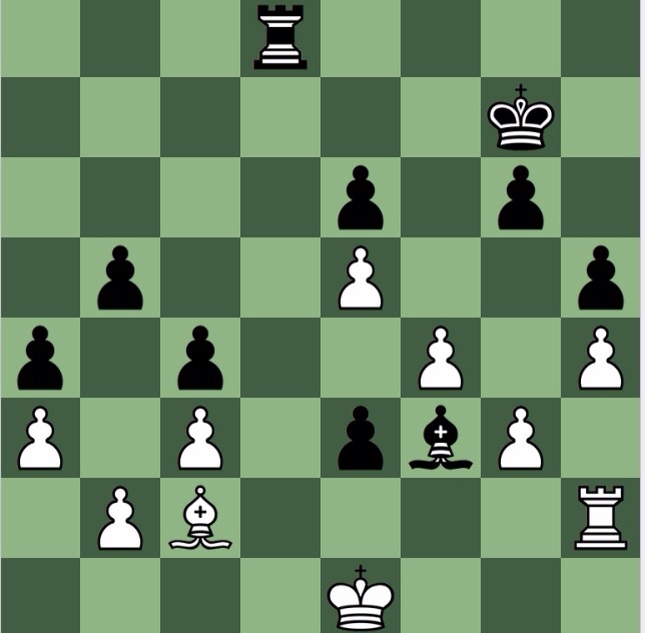
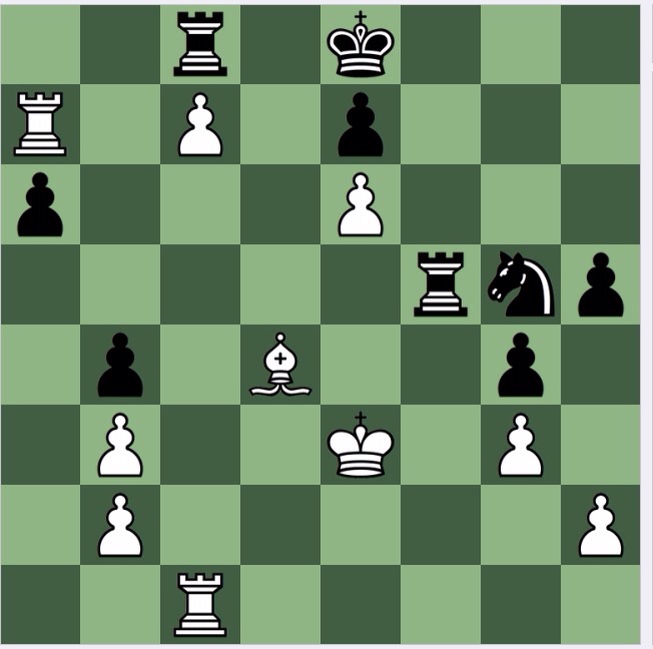
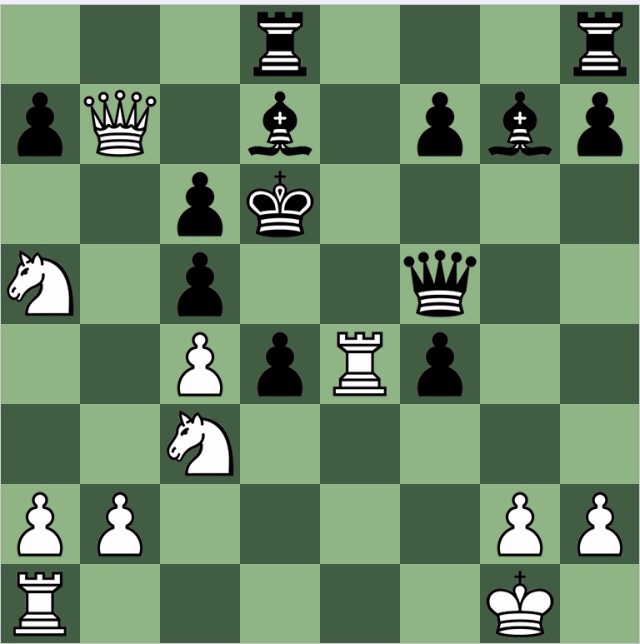
Black to play and win
H Steyn v JJ Steenkamp 2001
Solution
If 1…Kh6, white wins by 2 Be3+ forking king and queen. So what else? The interference 1…Bd7! is a natural try, and if 2 Qd7+ the queen is deflected; or if 2 ed black can mate with 2…Qg2+ etc.
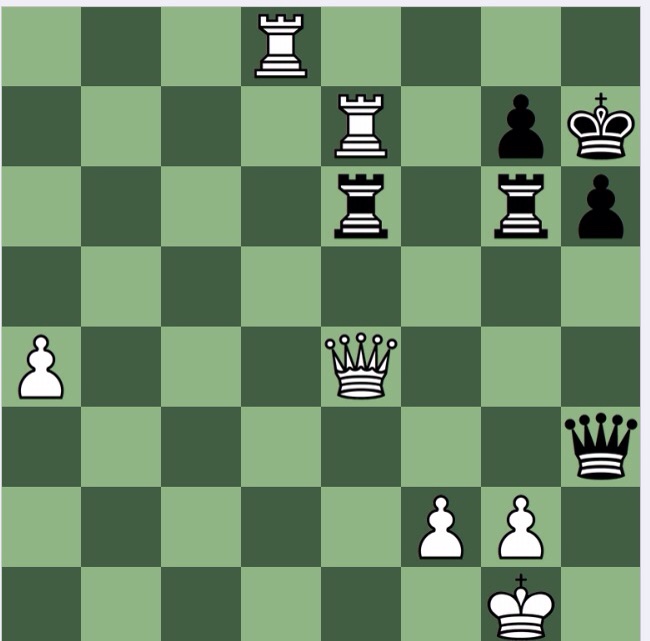
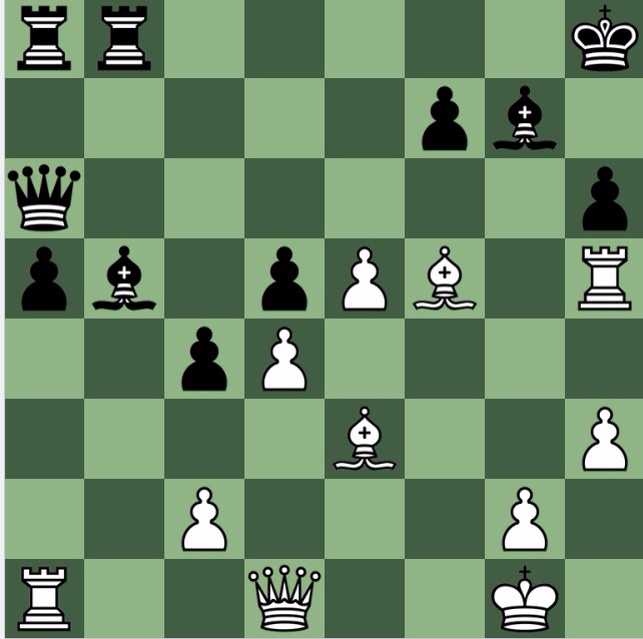
White to play: can he defend?
(Not one to spend much time on: not the best of puzzles today)
GW McElhinny v JG Heldzingen 1950-52
Solution
A really odd puzzle, especially because the rubric says white, in this correspondence game, resigned here, and Reitstein's question was what was Black's threat which caused white to resign.
So, the threat is obvious, Rh6, and one is tempted to find some reason why white was wrong to resign, but it doesn't take long to see that white's position is indeed hopeless.
Let's call it a day off.
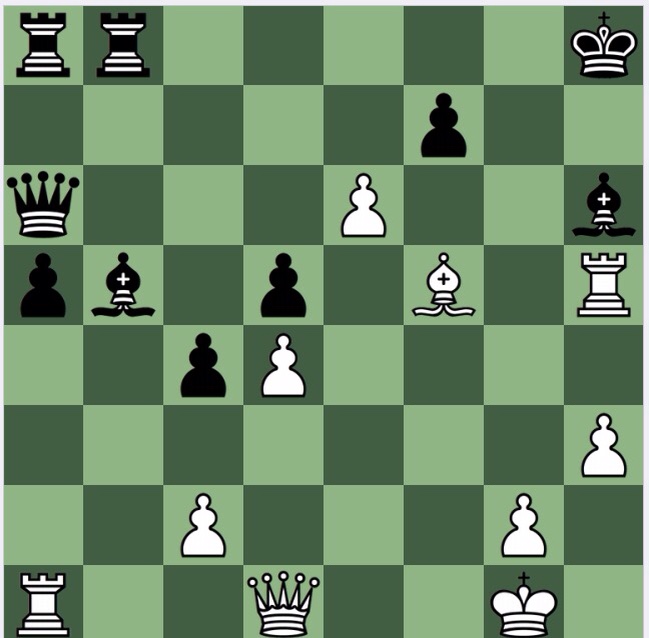
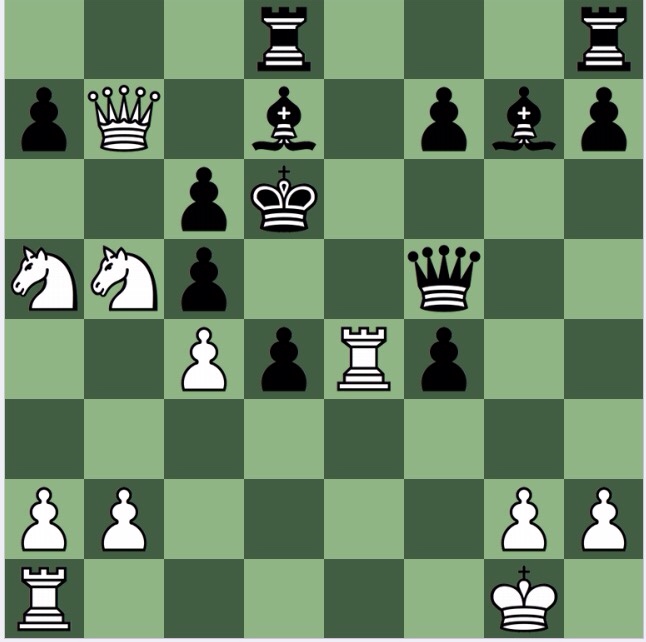
White to play and win
C Hoek v GA Hopkins 2004
Solution
A nice one today. White clearly has to breakthrough before black can muster his defences, but with black's restricted space he has some time. So he needs to bring all the pieces to the party. Two biffs have to be examined, and 1 Bf8!! is clearly better by comparison than 1 Rf8+ (because the latter permits, in fact forces, simplification) and after 1….Qc7 white has the nice rook lift 2 Rf6! aiming for h6 and h7. So 2…Rd8 3 Rh6 Rd7 defending h7 with equal numbers but 4 Bd6! deflects one of the defenders away.
Black could also try 1…Qg6 or 1…Qg8, both met by 2 Qf4, though 1…Qg8 can also be strongly (and better) met by the rook lift 2 Rf3!
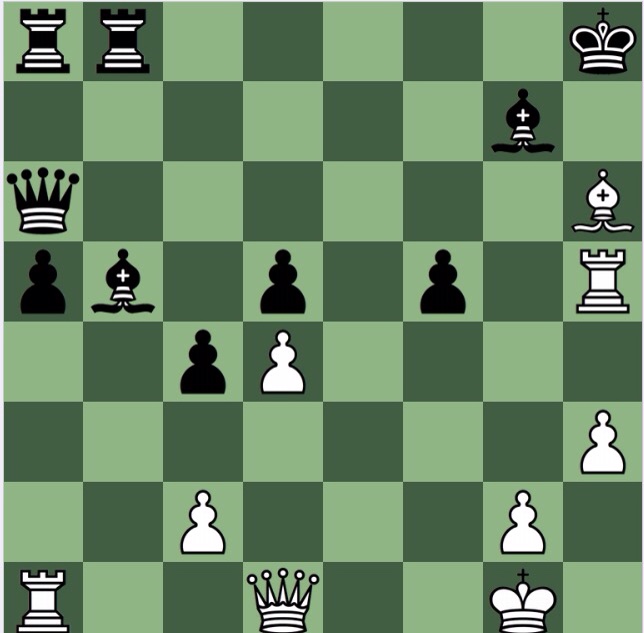
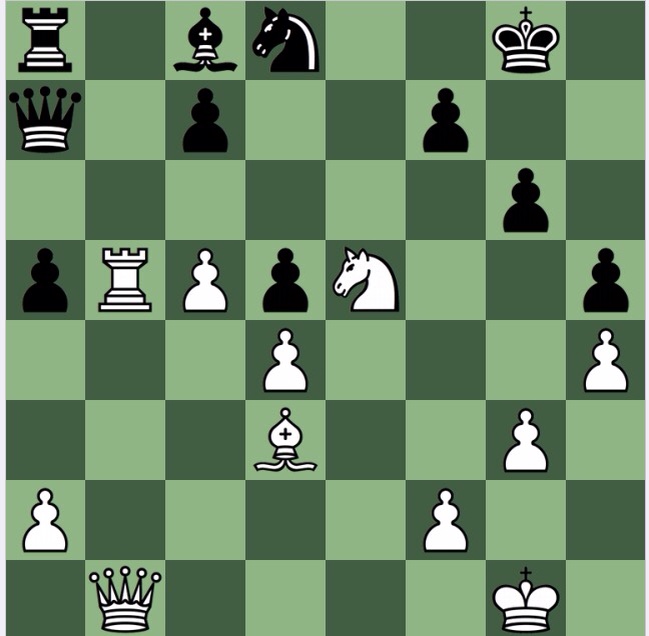
White to play and win
M Katz v E Pfister 1974
Solution
Full credit to white for finding the solution: knowing it is a problem, this was was a 'toughie', so in a game, it would have been far, far, harder. The obvious move to play, 1 Re6, leads to what I suspect could be a drawn position after 1…Qe6[] 2 Qe6 Re6[] 3 Ra8.

And I think black's h pawn means that he might be able to draw this position: although 'further investigation is required'.
However, I am very confident that in a game, as white, I would have played for the line, and hoped to win it (some months back, I saw an excellent video series by Alex Yermolinsky on ICC on similar to endings, and this taught me some of the common themes of this type of ending, or R+3 each on king side/ white having a passes offside pawn.
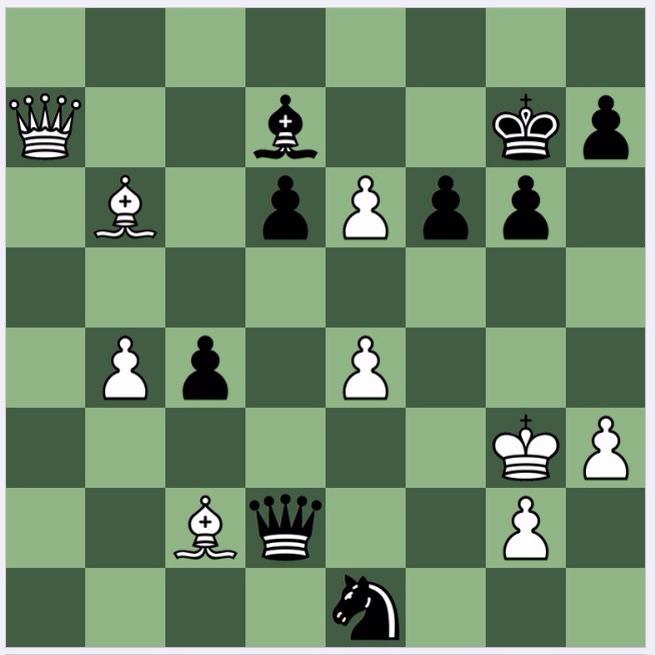
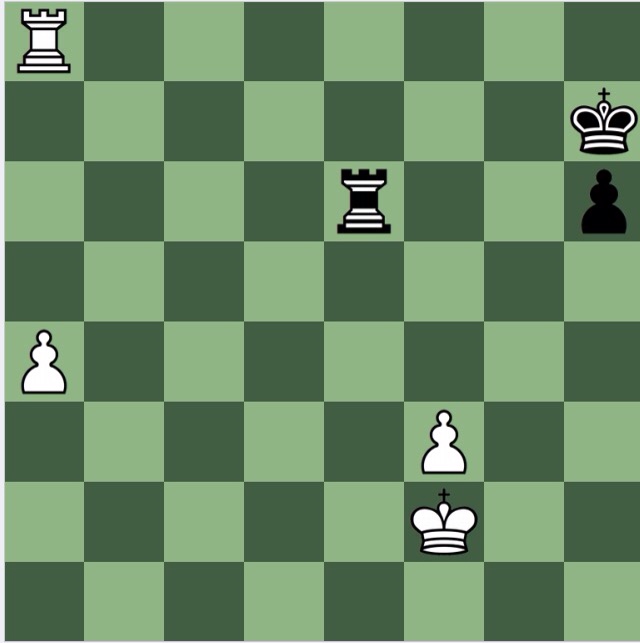
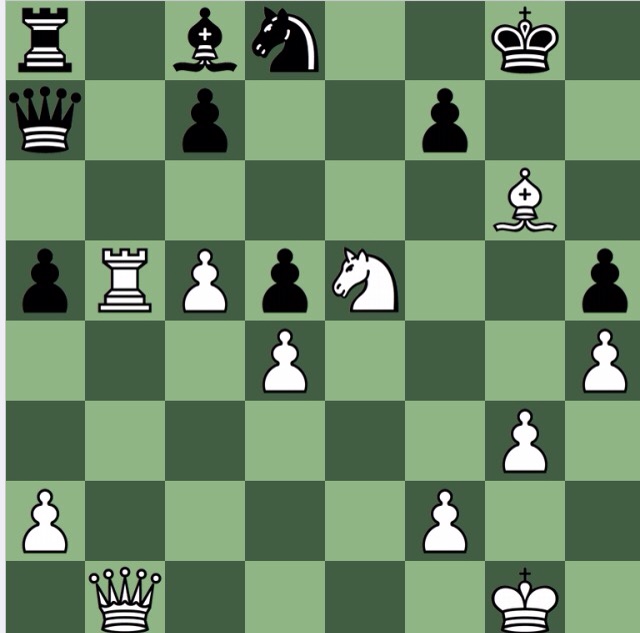
Black to play and win
A du P. Heyns v PJ Foley 1995
Solution
A rest day today: 1…Bf3 is the obvious pressurising move, if nothing else it constricts white's choices (particularly preventing 2 Re2). After a quick inspection it is obvious that white is in zugzwang: and a bad zugzwang, at that: 0-1.
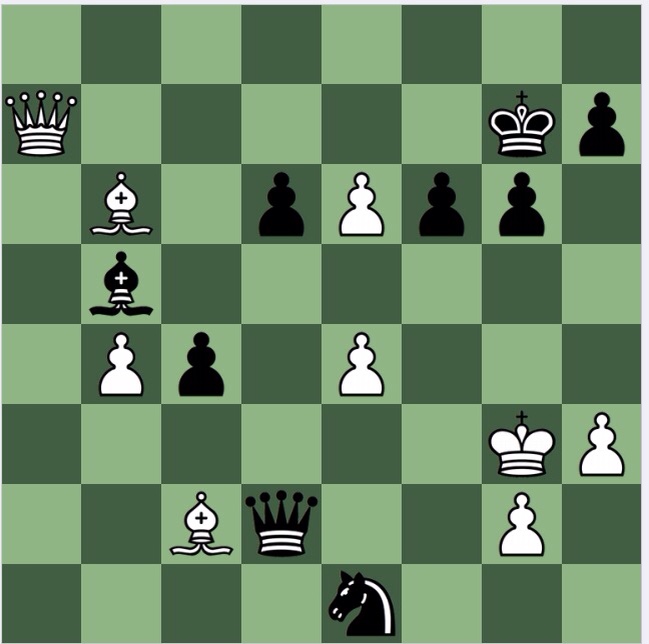
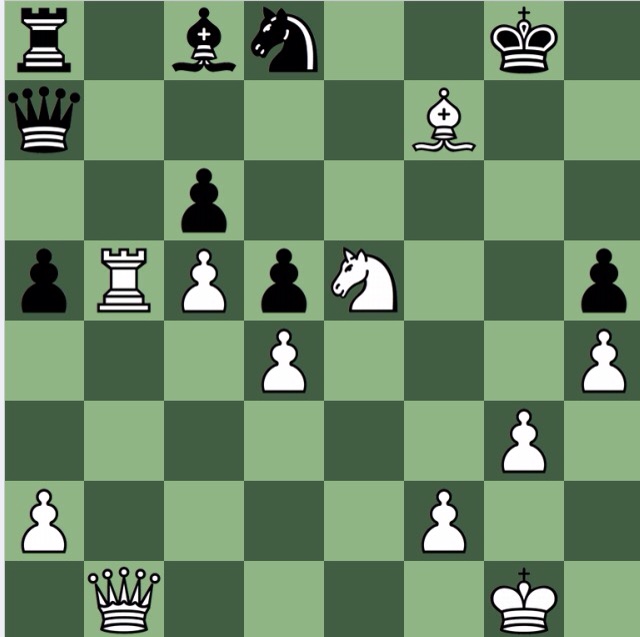
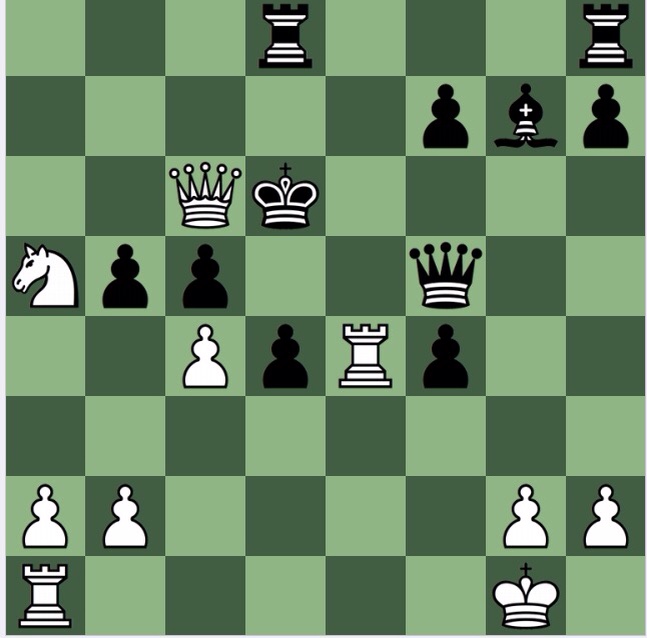
White to play and win
W Kobese v R Banai 1996
Solution
At first, I looked at the wrong move order: 1 e6, to disconnect black's queen from the kingside, followed up by 2 Bh6, but it gives black one more option (of 2…ef) compared with the better 1 Bh6!.
After 1 Bh6!, the win is trivial: 1…Bh6 2 e6! and the bishop falls (2…Kg7 3 Qg4+) after which white has too many pieces in the attack, with the Ra1 easily activated to boot, compared with all black's pieces being off side.
White to play and win
G Wall v M Keserovic 1995
Solution
Straightforward: 1 Ra8! and mates: 1…Ra8 2 c8(Q)+ Rc8 3 Ra8 mate.
Black can only avoid mate by ruinous material loss- for instance 1…Rf3+, 2..Ne6.
White to play and win
JJ Steenkamp v MG Smith 2002
Solution
The first move is fairly straightforward: the body count on the king side, with white having three pieces to black's one defender, makes the sacrifice 1 Bg6! automatic: especially since white remains with a queen and knight, a good attacking combination, plus the Nd8 being a LPDO, plus, for good measure, the easy with which the Rb5 can be 'lifted' ('downed') to b3 and then over to the f file.
So, 1 Bg6! fg 2 Qg6+:
2…Kf8 3 Rb3!; 2….Kh8 then probably 3 Qh5+ (always useful to gobble pawns) 4 Qg5+, 5Qd8+ (perhaps prefaced by Qe7+, depending on where the king is) 1-0.
Black could instead struggle on. 1…c6 is a tougher defence, met either by 2 Bh7+, and white is a safe pawn up, with the advantage to boot: and the availability of the safety check is all that is needed to know the sacrifice is playable. Or, white has (1…c6) 2 Bf7+! Nf7 3 Ra5! overloading the queen; 2…Kf8 3 Qh7…these lines don't really need calculating, being dependent on black's choice of poison.
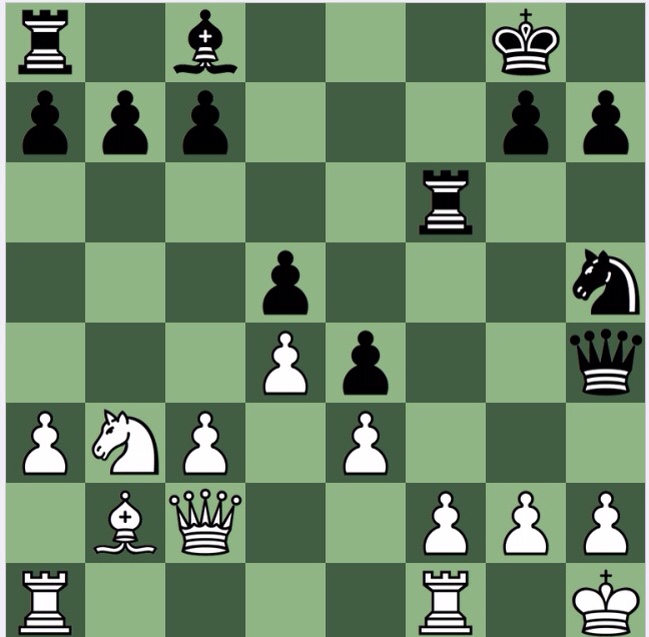
White to play and win – forced mate in 5
A Calitz v L Bouah 2000
Solution
Knowing that the problem is a mate in five, one has to look for forced lines. There are a few random checks which need to be looked at, such as 1 Rd4+?? 1 Qc6+?? 1 Re6+??, but one stands out as needing to be signed: 1 Nb5+!
Black's play is forced: 1…cb 2 Qa6+ Kc7[] (2…Bc6 3 Qc6 mate) 3 Qa7+ Kd6[] (3…Kc8 4 Qb7 mate) 4 Qb6+ Bc6[] 5 Qc6 mate.
A nice exercise, good practice for similar cases where you know there is a mate on board, just can't immediately find it.
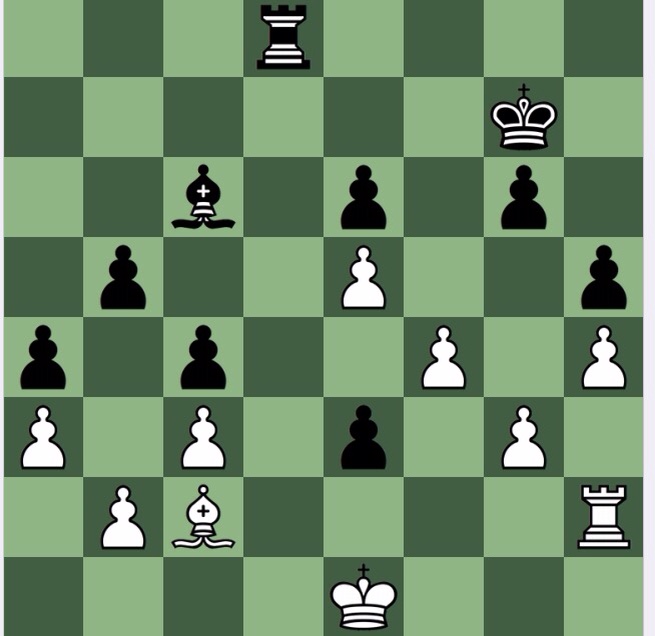
Black to play
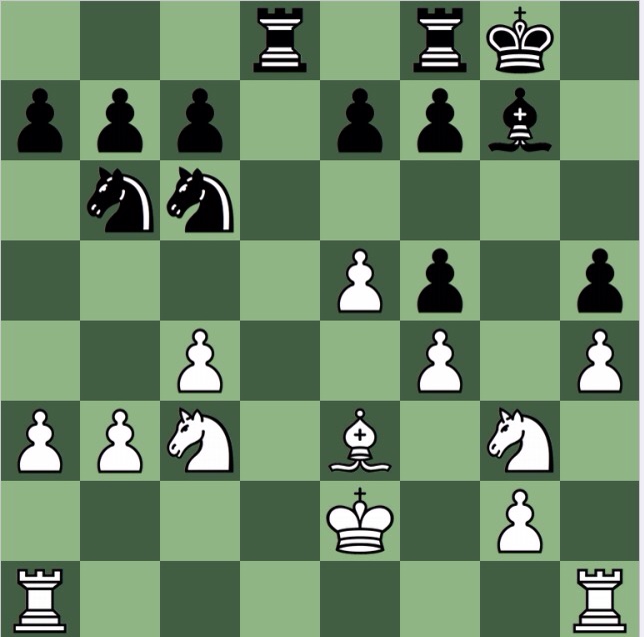
White has just played 1 Ke1-e2
D Morschel v K Whyld 1974
Solution
1…Ne5! (examine all biffs) and if the N is taken, then 2…Be5 forks both LPDO knights, and white's last move has prevented them from defending one another.
Reitstein says that black has won a pawn, and has the better game. This isn't correct: white retains an advantage after 3 Raf1 hitting the f5 pawn. If black defends it, 3…e6?, then he loses after 4 Bb6! and 5 Rf3- the crafty rook manoeuvre both hits the f5 pawn and prepares this tictac. So, after 3 Raf1, black must take one of the knights, and white captures on f5, and is a pawn up with the better position.